Tutorials

Tutorials fmannhardt Tue, 11/15/2011 - 14:39

A main goal of the YAWL User Group is to make knowledge about the YAWL system explicit. On the following pages we'd like to build up a collection of tutorials for both beginners and experienced users. You are invited to take part and help us, please use the forum "Tutorials and examples" for submissions or contact us directly info@yaug.org.

Video Tutorials

Video Tutorials ahense Sat, 05/09/2020 - 06:33

There are the following Youtube playlist with tutorials on YAWL:


Beginner track

Beginner track robert Sat, 11/08/2014 - 21:37

Installation

Installation fmannhardt Tue, 11/29/2011 - 12:50

Use YAWL in 5 Steps

  • Prerequisite:
  • Download the most recent YAWL(currently v4.2) suiting your operating system at  GitHub.
    • YAWL is ready out of the box, so that's the edition to choose for evaluation purpose.
    • YAWL Enterprise should be used in a production enviroment, but needs more configuration and contains no additional features.
  • Install YAWL using the guided installer (Windows), during the installation you will be asked your Java installation path.
    • Afterwards there should be a folder "YAWL vX.X.XX" in your program menu (Windows).
  • Start the YAWL Engine and the YAWL Editor.
    • On Windows you may need to adapt your firewall settings.
    • As YAWL is now running on Port 8080 on your local machine.
  • Examine for example the "/misc/examples/SimpleMakeTripProcess.yawl" specification in the YAWL editor
  • Now point your browser to the url "http://localhost:8080/resourceService/" and login using the credentials "admin / YAWL"
    • Congratulations! Your YAWL system is running.
    • If you would like to evaluate some of it's features, please head on to the next tutorial "Run a sample workflow"
  • If there are any issues, please consult the YAWL manual chapter 2 for more information.

sylvieratte

Sat, 03/21/2015 - 23:47

I am trying to install YAWL 3.0 (Mac OSX Maverick). I receive the message:
- Please stop the running YAWL engine (or nay Tomcat instance).
I am not aware having any engine running. This message puzzle me. How can I get thru the install?

Run a sample workflow

Run a sample workflow robert Sat, 12/27/2014 - 17:25

This Tutorial will guide you through the process of running the short YAWL example workflow "Simple Make Trip Process". With the "Orderfulfillment Workflow" there is a more sophisticated example included in each YAWL installation (Path: /examples/orderfulfillment). It is assumed that you have installed YAWL successfully and the Control Center is running.

  1. Login to the Control Center (if the YAWL engine is locally installed - http://localhost:8080/resourceService) with the administrative account (Credentials: admin/YAWL)
  2. Select the tab "Cases"
    • Select and upload the "Simple Make Trip Process" specification (Path: /examples/SimpleMakeTripProcess.yawl)
    • The  specification should appear in the "Loaded Specifications" box as on the following screenshot:
      controlCenter
    • Click "Launch Case" to start the workflow.
  3. Select the tab "Admin Queues"
    • Because there is no organisational data loaded in YAWL the first task "register" appears as a work item in the "Unoffered" queue. These work items are net yet assigned to any participant.
      adminQueues
    • The administrative user account can not be used to actually perform work. Therefore we need to create at least one participant, who performs the work. 
  4. Select the tab "Users"
    • Create a new participant by clicking on the "New" button.
    • Fill in details as in the following screenshot (Password: test)
      User
    • Click on the "Add" button to save the participant. There will be a warning message about missing role, position and capability that can be safely ignored.
  5. Return to tab "Admin Queues"
    • Select the work item "register" and click on the "Offer" button.
    • Now a list containing the just created user John Smith will appear. Select John Smith and proceed to put this work item into his offered queue.
      worklisted
  6. Logout the administrative user and Login as Joe Smith (Credentials: joe/test)
    • The work item "register" should appear in Joes "Offered" work queue.
      offered
    • Click the "Accept & Start" button to immediately move the work item to the "Started" work queue, skipping the "Allocated" work queue. You may also click "Accept" to move the work item to the "Allocated" work queue and perform your work later on.
      started
    • If you click on the "View/Edit" button a page with the work item appears.
      editWorkitem
    • Fill out the form as you like and click the "Complete" button to check-in the work item back into the YAWL Engine. Due to the AND-Split of the "Register" task the YAWL Engine now instanciates three tasks: "book flight", "book car", "book hotel"
  7. Logout Joe Smith and login as the administrative user
  • All three work items should be in the "Unoffered" work queue. Now you should be able to complete the whole workflow on your own. Simply assign all work items to Joe Smith, fill out the forms and complete them. Afterwards look for the "pay" work item in the "Unoffered" admins queue and repeat the steps. If the "Running Cases" box on the tab "Cases" is empty you have just completed your first YAWL workflow.

Install prerequisites under Windows 10

Install prerequisites under Windows 10 ahense Sat, 05/02/2020 - 16:38

Go to this site

https://adoptopenjdk.net/?variant=openjdk11&jvmVariant=hotspot

and choose OpenJDK 11 LTS and HotSpot JVM.

Execute the .msi installer and you are done. To check if it worked open a command prompt and enter

java -version

The result should be

openjdk version "11.0.7" 2020-04-14
OpenJDK Runtime Environment AdoptOpenJDK (build 11.0.7+10)
OpenJDK 64-Bit Server VM AdoptOpenJDK (build 11.0.7+10, mixed mode)
openjdk.png (13.39 KB)

Install YAWL 4.3 in Windows 10

Install YAWL 4.3 in Windows 10 ahense Sat, 05/02/2020 - 17:05

YAWL can be installed under Windows, Mac, and Linux. For YAWL 4.3 you need JAVA 8 or newer. If you don't have a JAVA installation yet look at this tutorial. 

  1. Go to the YAWL foundation web site.
  2. Run the YAWL installer and follow the instructions.
  3. Open the YAWL control panel.
  4. Click the update functionality.

Then the engine will start. You can check whether your installation was successful by clicking on the third button from the left ("Open the YAWL Logon Page"). A window should appear that shows you a login. There you can log in with user name admin and password YAWL.

Automated testing with Selenium

Automated testing with Selenium mRoskosch Mon, 07/01/2013 - 23:33

Testing workflows can be a tiresome task, but automating test cases can save time and make the process easier. Martin Giesler, a student of the Bonn-Rhein-Sieg University, has created an automated test suite for the "orderfullfillment" example using Selenium. This tutorial will show how to run the test suite and what it's prerequisites are.

The Selenium IDE can be downloaded from the homepage. Note that you need version 2.2 to run with Firefox 22. Other browser can be used, but there drivers are not supported be the selenium hq. Attached to this tutorial are the files needed for selenium to execute the workflow.

Next the orderfullfillment example needs to be loaded to the YAWL Engine. The workflow and oranisational data can be found in the YAWL Installation folder in the subfolder "examples\orderfulfillment". There you should find the "orderfulfillment_customforms.yawl" workflow specification and "orderfulfillment.ybkp", which should both be uploaded in the YAWL resource service.

Now that all preparations are complete, the test suite can be run. To open Selenium, you need to open the Firefox browser that has the Selenium add-on installed and start it from the "extras" or "tools" menu:

The Selenium window will open and after loading the "TestSuite" file in the subfolder "Order Fulfillment TestSuite" of the attached archive, the window will look something like this:

Below the Base URL is a slider, that lets you specify the speed at which the test case should be executed. Keep in mind, that a too high value can cause problems in execution. Next to the slider are buttons to start the test suite. If YAWL is running, clicking the button "Play entire test suite" should run the scripts and start the test suite. During execution serveral users will log in and complete the tasks assigned to them until the workflow is completed.

Result

These test suites are important for YAWL developers as well, since adding new features can add bugs and break existing functions. If you have test suites for other example workflows, the YAWL user group would be glad to publish them for other users and doing that, make developing for YAWL easier.

Please note:
This tutorial suppose that the YAWL-Server is in operation on the same machine as your Selenium-IDE.

SeleniumTest.zip (18.2 KB)

How do you upload a ybkp file to the resourceService?

I got the message "Only yawl files with an extension of '.yawl' or '.xml' may be uploaded." after trying.

I give the answer to myself. The ybkp file must be imported as orgData.

Important for testers: This Selenium Script does not work with YAWL3 due to changes of the HTML-Element id's

Selenium test for "Timeout tasks manual"

Selenium test for "Timeout tasks manual" k.schildt Sat, 01/25/2014 - 16:23

If you haven't install Selenium IDE, go to the Selenium tutorial please.
Download the data "TestSuites TimeoutTasks manual".
Please check that you have uploaded the file "TimerManualTimeout" in the control
center and check that you imported the OrgData successful in the control center.

If you haven't the file "TimerManualTimeout.yawl" or the File of the OrgData (YAWLOrgDataExport_o.ybkp), please download these from the tutorial
"Using a timer for the timeout of manual tasks".
As next check , that the roles were distributed to the right members as it is written in the table.
After that you must log out of the control center. The test starts with the login screen.

TestSuite TimeoutTasks manual part1: That test suite is for a normal run of the
workflow without a timeout failure.
Load the data " TestSuite TimeoutTasks manual part1" of the folder " Part1"
in the Selenium tool and start the TestSuite.

TestSuite TimeoutTasks manual part2: The secound test suite should represent a task
timeout for the workflow.
For that you load the data " TestSuite TimeoutTasks manual part2" of the folder "Part2 "
in Selenium.
As next you must toogle a breakpoint in the task " Comment on health" at
the first command ( screenshot) and then go to the options tab and set the time for
default time out on 5000ms.

Selenium

If you start the TestSuite , the run will be stop at the break point. Wait 2 min (timeout
time) and then click on the "pause/resume" - button. The run will go on now.
The three "comment"- tasks will be fail, but the "decide"-task will be run successful.

How to reset YAWL to its original state?

How to reset YAWL to its original state? fmannhardt Fri, 01/06/2012 - 16:25

Resetting YAWL may be useful, if you want to delete all users from the resource service at once. Also if you've been hit by a bug inside YAWL that may be related to a specification you've uploaded recently. As YAWL stores everything inside the connected database, resetting YAWL just means to restore the initial database. If you've configured YAWL to work with another database than the file based Derby database (Default with YAWL4Study), you should simply delete the contents of your database. If you are using the default Derby database do the following:

  1. Stop YAWL
  2. Remove the file "/engine/apache-tomcat-7.0.55/databases/yawldb.h2.db" (Warning: You will lose all data inside YAWL)
  3. Start YAWL


For YAWL versions prior to 2.3.5

  1. Stop YAWL
  2. Remove the directory "/engine/databases/yawldb" (Warning: You will lose all data inside YAWL)
  3. Copy the directory "/misc/yawldb" to "/engine/databases/yawldb"
  4. Start YAWL

In my Version there is no 'databases/yawldb' and also no '/misc/yawldb'.
Even deleting the whole DB-folder does not lead to success.
Is there another way then reinstalling?

Build a Workflow using Deferred Allocation

Build a Workflow using Deferred Allocation ahense Sun, 11/10/2013 - 15:54

We want to use deferred allocation. An insurance claim will be forwarded to a specialist depending on its content. There are specialists for health, house, car and life insurance. The complete workflow is contained in file DeferredAllocation.yawl. We will outline the steps that are necessary to create this workflow.

Organisation

The first step is to set up an organisation

First name

Last name

Roles

Username

Password

Simone

Martini

claimer

sim

pass

Jean

Pucelle

allocator

jep

pass

Ambrogio

Lorenzetti

health specialist

aml

pass

Pietro

Lorenzetti

house specialist

pil

pass

Lorenzo

Monaco

car specialist

lom

pass

Jean

Fouquet

life specialist

jef

pass

You can either enter this organisation using the control center or you can import the file YAWLOrgDataExport.ybkp.


Instruction to import organisation data:

Please open the control center and log in as "admin" :


XSD Types


Instruction to import data type definitons:


In order to have the specialist roles in a drop down list in a task, we define the following type in the data type definitions of the net:

<xs:schema xmlns:xs="http://www.w3.org/2001/XMLSchema">

<xs:simpleType name="SpecialistRolesType">

<xs:restriction base="xs:string">

<xs:enumeration value="health specialist" />

<xs:enumeration value="house specialist" />

<xs:enumeration value="car specialist" />

<xs:enumeration value="life specialist" />

</xs:restriction>

</xs:simpleType>

</xs:schema>


Net variables

We define the following variables in our top level net:

Variable name

Type

Usage

Remarks

claim

string

Local

A text explaining the claim.

accept

boolean

Local

True if the claim is accepted – false otherwise.

role

SpecialistRolesType

Local

The type for the drop down list from the previous section.

roleString

string

Local

A „type conversion“ of variable role, because variables for deferred allocation must be of type string.


Two nets for the control flow

The first plan was to create one simple net for this example.

However, there is a problem: the YAWL User Manual says:

„Additionally, in the Net Parameters panel you may nominate one or more net-level variables that at runtime will contain a value of the userid of a participant or the name of a role (that is, deferred allocation). For a variable to appear in the Net Parameters panel, it must be of type ‘string’ and usage ‘Input & Output’ or ‘Input Only’.“

This means that we want to use variable roleString for deferred allocation we have to change its usage to „input“. The consequence is that we have to enter some value each time we start the workflow. (We do not know the reason for this restriction)

As a workaround we put the deferred allocation task „Choose specialist“ in a subnet and get the following two nets:

as top level containing

We define the following variables in our subnet:


Variable name

Type

Usage

Remarks

claim

string

Input Only


accept

boolean

Input & Output


role

SpecialistRolesType

Input & Output


roleString

string

Input & Output

This variable can now be used for deferred allocation in „Evaluate the claim“.

We have defined the net variables first in order to use „Decompose to direct data transfer“ as much as possible. Most of the mappings are standard an can be examined by loading DeferredAllocation.yawl into the YAWL editor.

One thing worth mentioning is the task „Choose specialist“, where we want to have our drop down list. The variable containing the drop down list is called „role“. The result of the user selection must be in variable „roleString“. The solution is an output mapping of „role“ to „roleString“ and to hide the task variable „roleString“ using extended attributes.


Changing the look of dynamic forms

Changing the look of dynamic forms k.schildt Fri, 05/23/2014 - 20:32

If you have ever found yourself in a position to present some YAWL workflows, but would like to use something looking a bit moe modern, then this tutorial might be something for you.

I am going to present a new stylesheet for YAWL dynamic forms, giving them a more modern feeling using some CSS techinques. Of course this means some older browsers will not be able to display these new features, but for presentation purposes, it can give you an advantage to style the forms in the corporate design or colors of the company. To show the difference between the two styles, a side by side comparison is the best way, so now the results of the face-lift:

What I have done is adding some elements, that you surely have already seen on other web sites. Here is a list of the changes:

  • the form's edges have been smoothed
  • shadows have been added to the text fields
  • fields in focus now glow in a light blue
  • buttons now have a blue color and have an hover-over effect
  • invalid fields glow red instead of the field being filled red
  • other colors have been removed to get a cleaner look
  • required fields are now marked with a "*", instead of having a yellow background


Attached to this tutorial is the stylesheet.css file and the star.png used for the required fields. Both files have to be copied to the sub folder "resource" of the "resourceService" folder in the webapps dircetory of your YAWL installation. To use the new .css file you may need to reload the resource service site without using the cache, because some browsers don't load the css file everytime a website is called and use the cached file instead. In the Firefox browser this is done by the keybord shortcut [Ctrl] + [Shift] +[r].

The original CSS file is already well structured, so the classes used by the dynamic form generator are marked. Here is a list of classes that I have modified to achieve the result above:

  • dynformOuterPanel - the outer panel surrounding the entire form
  • dynformSubPanel - panel that is used to group together fields
  • dynformSubPanelAlt - panel that is used alternately with dynformSubPanel to create a visual distinction
  • dynFormButton - used for the three buttons below the form
  • dynformOccursButton - used for the buttons to increase or decrease number of elements using maxOccurs
  • dynformInput - text field for a not mandatory field
  • dynformInputRequired - text field for a mandatoy field
  • dynformInputError - fields that have invalid values

With CSS you can also use effects like the hover effect on the buttons or the focus effect on the fields. Since some elements could not be changed by just editing these classes, the specifity had to be increased for the date field to take effect:

td span .TxtFld{ ... }

and the checkbox would have received the style of the other text fields, which have to be overwritten by this rule:

dynformInput.CbSpn{ ... }

CSS allows a lot of customization itself and interesting effects can be made with animations. It would be interesting to receive styles that other users have made and give YAWL users a range of styles to choose from.

stylesheet.css (16.69 KB)
star.png (250 bytes)

Use a timer for delaying automated tasks

Use a timer for delaying automated tasks ahense Tue, 12/03/2013 - 10:46

This example uses shell execution and is written for a Linux operating system. The YAWL workflow is here: TimerAutomatedDelay.yawl

We want to build a simple workflow that uses a delay for automated tasks as it is described in the YAWL User Manual. We create a new net that uses the shell execution codelet to create files in a temporary directory. The path to the temporary directory is stored in a net variable named tmpDir. In our case the path is /tmp/.

TimerAutomatedDelay.png

We create the Delay 10 task with tmpDir as input variable. Then we go to task decomposition and mark the task as automated. We select the ShellExecution Codelet. Note that after this step the variables command and result are automatically inserted into the task. We now populate the task variable command with
        touch {/TimerAutomatedDelay/tmpDir/text()}/Delay10.

Next we set the task timer. According to the YAWL User Manual we can express 10 seconds like this: PT10S.

We set up the tasks Delay 20 and Delay 30 in an analogous way.

Go to the /tmp directory. After starting this workflow you should see files called Delay10, Delay20 and Delay30 appear after 10, 20, and 30 seconds.


(Notice: This tutorial is based on  YAWL version 2.2.x)

Using a timer for the timeout of manual tasks

Using a timer for the timeout of manual tasks ahense Wed, 12/04/2013 - 10:10

A common problem is the coordination of several parties. We want to give a number of participants the chance to comment on something but we do not want to wait indefinitely.
YAWL timer tasks can help here.

For the following workflow, we will be using the same ybkp file as here. The YAWL file is here.


Someone submits a claim and several specialists comment on it before a decision is prepared. The specialists only have a limited time to comment.

We start a new net with string type net variables claim, healthComment, houseComment, and lifeComment. We add a boolean type net variable accept. The task Submit claim takes claim as input and output variable and is offered to the role claimer. The task Comment on health has the claim as input variable and  healthComment as output variable. It is offerd to the health specialist. It times out two minutes after enablement (PT2M).


The other two commenting tasks are similar.


The task Decide takes the claim and the comments as input and accept as input and output variable. This task is offered to the role allocator.

k.schildt

Sun, 12/08/2013 - 14:45

Hello,

I have a problem with the "Submit claim" task,  I can offer only one submit claim task to one specialist and not to all three. And so I can't reach the task "Decide" .


I hope somebody can help me.

Kai Schildt


Documents in Workflows

Documents in Workflows ahense Wed, 09/24/2014 - 09:29

Document handling in workflows is an important topic. Uploading and downloading documents - possibly from a document management system - is at the core of administrative activities. Fortunately, YAWL has a built-in datatype called YDocumentType for doing exactly that. So let us follow the section on document type of the YAWL user manual to see how it works.

We start the YAWL engine, open the YAWL editor, and add two tasks.

step1

We click on the first task and create a new decomposition called "Upload".

step2

We create a data variable in our net called "document" of type "YDocumentType".

step3

We now edit the data variables of task "Upload", pull the variable "document" from the net variables down to the decomposition variables. We should change the scope to "Output".

We proceed in a similar fashion with task download. The only difference being that the scope of the variable is now "Input".

That should be all. Save the file as document.yawl. We can now upload it to the running YAWL engine with the "Upload this specification to the YAWL engine"-button (7th from the left). When we start the workflow we get the following work item.

Pressing the up-arrow will give us a browse-upload dialog. After choosing a file we complete the activity and proceed to the download activity.

If you don't want to build the workflow yourself and just try the functionality the result of this tutorial is attached here.


document.yawl (6.02 KB)

ury_sazontov

Wed, 05/27/2015 - 16:58

How to define custom user type in YAWL editor 3.01 based on YDocumentType. If I specify YDocumentType for element of complex type, the Yawl editor return the error:

FIRST EXAMPLE
Input:
<xs:schema xmlns:xs="http://www.w3.org/2001/XMLSchema"&gt;
<xs:complexType name="myType">
<xs:sequence>
<xs:element name="myElelment" type="YDocumentType"></xs:element>
</xs:sequence>
</xs:complexType>
</xs:schema>

Error:
Error: 5:54: src-resolve: Cannot resolve the name 'YDocumentType' to a(n) 'type definition' component.

SECOND EXAMPLE
I new define YDocumentType, the Yawl Editor return next error
Input:
<xs:schema xmlns:xs="http://www.w3.org/2001/XMLSchema"&gt;
<xs:complexType name="YDocumentType">
<xs:sequence>
<xs:element name="id" type="xs:long" minOccurs="0"/>
<xs:element name="name" type="xs:string"/>
</xs:sequence>
</xs:complexType>
</xs:schema>

Error:
Error 2:22: [YDocumentType] is a reserved type name.

Michael Adams

Mon, 05/08/2017 - 05:11

YDocumentType is a YAWL internal type specifically designed and used to support document passing and storage within a YAWL workflow instance. As such, it cannot be redeclared, extended, restricted or used as a type for a member element of a user-defined complex type.

Configure YAWL to use database XY

Configure YAWL to use database XY fmannhardt Tue, 02/21/2012 - 18:50

Introduction

As YAWL uses hibernate as persistence layer it supports every database that Hibernate supports. (see here) All you need to do is to configure the database in the hibernate.properties file of the three web applications "resourceService", "yawl" and "workletService". This is briefly explained in the YAWL user manual section 2.4.4. In the following sections we provide detailed information to get YAWL working with different database management systems.

Databases

Regardless the database you'd like to use, there is one (since YAWL 3) configuration file you have to adjust:

  • \engine\apache-tomcat-x.x.xx\yawllib\hibernate.properties

Apache Derby

The YAWL4Study edition is pre-configured to use the embedded database Apache Derby. Although this database provides full support for YAWL it is generally not recommended to be used in a production system. For development or evaluation use it is sufficient. The database is located in the directory \engine\databases of your YAWL4Study installation. Details on building the correct connection url for Apache Derby can be found in the Derby documentation.

hibernate.properties:

## Apache Derby
hibernate.dialect=org.hibernate.dialect.DerbyDialect
hibernate.connection.url=jdbc:derby://localhost/C:/Users/UserXY/YAWL4Study-2.2.01/engine/databases/yawldb;create=true
hibernate.connection.driver_class=org.apache.derby.jdbc.ClientDriver

PostgreSQL

PostgreSQL is the default database of the YAWL enterprise edition. Therefore the easiest way to use PostgreSQL is to install the enterprise edition of YAWL and you will be asked for details about your PostgreSQL server during installation. But if you already installed YAWL4Study, you have to adjust your hibernate.properties to the following configuration. Details on building the correct connection url for PostgreSQL can be found in the PostgreSQL documentation.

hibernate.properties:

## PostgreSQL
hibernate.dialect org.hibernate.dialect.PostgreSQLDialect
hibernate.connection.driver_class org.postgresql.Driver
hibernate.connection.url jdbc:postgresql:yawl
hibernate.connection.username yawl
hibernate.connection.password yawl

MySQL

To use MySQL you should install the YAWL enterprise edition, as MySQL is a configuration option during the installation. If you'd like to switch to MySQL later on, then adjust the hibernate.properties files as follows and add the correct MySQL JDBC Driver to the lib directory of YAWLs Apache Tomcat. Details on building the correct connection url for MySQL can be found in the MySQL documentation. You may want to choose the MySQL5InnoDBDialect instead of the usual MySQlDialect if you want YAWL to generate InnoDB tables. (Read more about InnoDB)

MySQL JDBC Driver:

  1. Download JDBC Driver from http://dev.mysql.com/downloads/connector/j/
  2. Copy mysql-connector-java-5.x.xx-bin.jar to \engine\apache-tomcat-6.0.18\lib

hibernate.properties:

## MySQL
#hibernate.dialect org.hibernate.dialect.MySQL5InnoDBDialect
hibernate.dialect org.hibernate.dialect.MySQLDialect
hibernate.connection.driver_class com.mysql.jdbc.Driver
hibernate.connection.url jdbc:mysql:///yawl
hibernate.connection.username root
hibernate.connection.password root

MSSQL (SQL Server 2005/2008)

To use MSSQL you need to adjust the hibernate.properties files as follow and add the correct MSSQL JDBC Driver to the lib directory of YAWLs Apache Tomcat. Please note, the Microsoft JDBC Driver is not Open Source and there are other implementations available. (For Example jDTS) Details on building the correct connection url for MSSQL can be found in the MSSQL documentation.

MSSQL JDBC Driver:

  1. Download JDBC Driver from http://www.microsoft.com/download/en/details.aspx?displaylang=en&id=21599
  2. Copy sqljdbc4.jar to \engine\apache-tomcat-6.0.18\lib

hibernate.properties:

## MS SQL Server
hibernate.connection.driver_class com.microsoft.sqlserver.jdbc.SQLServerDriver
hibernate.connection.url jdbc:sqlserver://localhost\SQLEXPRESS;databaseName=yawl;user=yawl;password=yawl;SelectMethod=cursor
hibernate.dialect org.hibernate.dialect.SQLServerDialect
hibernate.connection.username yawl
hibernate.connection.password yawl

I am using YAWL4Study 2.3 on an Ubuntu Linux.

I set up a postgres database with a database called 'yawl' and a user 'yawl' with password 'yawl' who owns the yawl database and has administration rights.

Then I modified the three hibernate properties files like this:

**********************************************************
## PostgreSQL
hibernate.dialect org.hibernate.dialect.PostgreSQLDialect
hibernate.connection.driver_class org.postgresql.Driver
hibernate.connection.url jdbc:postgresql:yawl
hibernate.connection.username yawl
hibernate.connection.password yawl

## H2

#hibernate.dialect=org.hibernate.dialect.H2Dialect
#hibernate.connection.driver_class=org.h2.Driver
#hibernate.connection.url=jdbc:h2:/home/ahense/YAWL4Study-2.3final/engine/databases/yawldb;MVCC=TRUE
**********************************************************

After restarting the engine, YAWL keeps using the file-based database and does not create any tables in postgres.

What am I missing here?

I tried to run with all 'hibernate.properties' files modified like in your configuration. YAWL creates the tables in PostgreSQL automatically and is running fine. Can you check the console output of YAWL (or log file if used as service) for lines like the following and post them.

- HHH000130: Instantiating explicit connection provider: org.hibernate.service.j
dbc.connections.internal.C3P0ConnectionProvider
- HHH010002: C3P0 using driver: org.postgresql.Driver at URL: jdbc:postgresql:ya
wl
- HHH000046: Connection properties: {user=yawl, password=****}
- HHH000006: Autocommit mode: false
- Initializing c3p0 pool... com.mchange.v2.c3p0.PoolBackedDataSource@518f739a [
connectionPoolDataSource -> com.mchange.v2.c3p0.WrapperConnectionPoolDataSource@

Thank you. I have tried with several fresh installations of YAWL 2.3: it keeps using the file for persistence and ignores postgres. Even renaming the three hibernate.property files didn't work.

I have tried it with YAWL 2.2: it used postgres right away after changing the hibernate.property files accordingly.

I have looked at all the files in the logs directory of tomcat but there are no lines like the ones you posted. The catalina.out looks like this:

Dec 04, 2012 3:34:22 PM org.apache.catalina.core.AprLifecycleListener init
INFO: The APR based Apache Tomcat Native library which allows optimal performance in production environments was not found on the java.library.path: /usr/java/packages/lib/amd64:/usr/lib64:/lib64:/lib:/usr/lib
Dec 04, 2012 3:34:22 PM org.apache.coyote.http11.Http11Protocol init
INFO: Initializing Coyote HTTP/1.1 on http-8080
Dec 04, 2012 3:34:22 PM org.apache.catalina.startup.Catalina load
INFO: Initialization processed in 449 ms
Dec 04, 2012 3:34:22 PM org.apache.catalina.core.StandardService start
INFO: Starting service Catalina
Dec 04, 2012 3:34:22 PM org.apache.catalina.core.StandardEngine start
INFO: Starting Servlet Engine: Apache Tomcat/6.0.18
Dec 04, 2012 3:34:22 PM org.apache.catalina.startup.DigesterFactory register
WARNING: Could not get url for /javax/servlet/resources/web-app_2_5.xsd
Dec 04, 2012 3:34:22 PM org.apache.catalina.startup.DigesterFactory register
WARNING: Could not get url for /javax/servlet/resources/web-app_2_5.xsd
log4j:WARN No appenders could be found for logger (com.sun.faces.config.ConfigureListener).
log4j:WARN Please initialize the log4j system properly.
log4j:WARN See http://logging.apache.org/log4j/1.2/faq.html#noconfig for more info.
ContextListener: attributeAdded('com.sun.faces.ApplicationAssociate', 'com.sun.faces.application.ApplicationAssociate@4faa65fe')
Dec 04, 2012 3:34:30 PM org.apache.coyote.http11.Http11Protocol start
INFO: Starting Coyote HTTP/1.1 on http-8080
Dec 04, 2012 3:34:30 PM org.apache.jk.common.ChannelSocket init
INFO: JK: ajp13 listening on /0.0.0.0:8009
Dec 04, 2012 3:34:30 PM org.apache.jk.server.JkMain start
INFO: Jk running ID=0 time=0/21  config=null
Dec 04, 2012 3:34:30 PM org.apache.catalina.startup.Catalina start
INFO: Server startup in 8392 ms

Maybe the log4j warnings give some hints?

The log4j warnings are not about the issue. Unfortunately I can't test with Linux at the moment. Recheck if there is a file like "postgresql-9.0-801.jdbc4.jar" in the "engine/apache-tomcat-6.0.18/lib" of YAWL.

Please attach all log files (I just enabled "attaching files in comments"), that includes log files in "engine/apache-tomcat-6.0.18/bin" and "engine/apache-tomcat-6.0.18/logs". Probably it is best to upload  the whole, zipped, YAWL directory and I will have a look.

Christoph Lehnert

Thu, 10/24/2013 - 17:54

I am also using YAWL4Study 2.3.5 on an Ubuntu Linux and faced the same problem.
After adjusting the configuration file \engine\apache-tomcat-6.0.18\webapps\documentStore\WEB-INF\classes\hibernate.properties as mentioned above everything worked fine for me.

matteo spiotta

Wed, 06/08/2016 - 10:19

I'm using YAWL 4 with MSSQL 2008. All work fine aside handling YDocument. Im using YAWL with the data store service. By default the yDoc column in the YDocument table is defined as varbinary(255).
It can be extended to 8000 (maximum size allowed by MSSQL) adapting the function fixH2BinarySize in DocumentSore.java to work also for MSSQL db.
To handle bigger file I had to modify the methods getDocument and PutDocument to store and retrive document directly in/from the filesystem.
Please contact me if you solved the same problem in other ways.

Using YAWL 3.0 Repositories

Using YAWL 3.0 Repositories ahense Fri, 10/03/2014 - 15:57

YAWL 3.0 has a new functionality for storing nets, extended attributes, and data types in repositories. In real life projects it is really important to reuse parts of workflow specifications. One example are extended attributes. The field name of a variable is its technical name by default. If we want to give it a nicer name including blanks or add text above, tooltips, etc. we can do that by giving the variable in a task extended attributes. If the variable appears in ten different places, in YAWL 2.3 we had to do the editing for the extended variables over and over again. This was not only time consuming but error prone. Now the repository concept in YAWL 3.0 tackles this issue. We will build a small workflow to see how it works.

The example is about applying for some post. We define the simple type FormOfEmploymentType as follows:

We define the following net variables:

Technical name Field name Type
postDesc Post description string
formEmpl Form of employment FormOfEmploymentType
stDate Start date date
avail Available boolean

The field name is not part of the net variable but will be entered as an extended attribute of the corresponding task variable. We do this now by defining task "Choose post":

For the variable postDesc we edit the extended attributes by clicking on (=)

Apart from the label, we check that it is a text area and enter some tooltip. We do something similar to the other task variables. We start the workflow to see if all works as expected:

That looks nice - also the tooltips work when we hover the mouse over the fields. Now we will save the extended attributes in the repository in order to reuse them in task "Check availability". We go back to the extended attributes of postDesc and store it in the repository:

We give it the name of the technical variable and put the same in the description.

Now we are ready to proceed to task "Check availability". We open it in the editor and pull the required variables inside and adjust their input/output behaviour as follows:

Next we pull the extended attributes for the variables we have already defined and define some for the variable "avail". We run the workflow to see if it works.

That concludes this short tutorial. The resulting workflow is attached. In the next tutorial we will see how we can import this workflow as a subnet to another workflow using repositories.


repository.yawl (9.4 KB)

Web Service Invoker

Web Service Invoker ahense Fri, 12/12/2014 - 13:28

We will see how the web service invoker service of YAWL can be used. We will create a workflow that invokes a publicly available web service.

workflow

The first thing to check is if the YAWL web service invoker is installed. In the YAWL control panel click on Updates. In the line yawlWSInvoker check the mark if it is not checked and click Update.

We create a new workflow and a task with a new decomposition called "Invoke WS". We choose the webServiceInvoker service as the custom service of this decompostion. The editor will then insert the following three task variables:

  • YawlWSInvokerWSDLLocation
  • YawlWSInvokerPortName
  • YawlWSInvokerOperationName

We create corresponding net variables and map them to the created task variables via an input mapping.

Next we look for a simple web service that is publicly available:

http://www.service-repository.com/service/overview/877027757

shows a web service that does calculations. We can use it to add two numbers x and y and get the result. We add the net variable x, y, and Result to the net and insert two tasks that do the input and output to the user. We initialise our net variables in order to access our web sevice like this:

That's all. Workflow is attached here.

WSInvoker.yawl (11.45 KB)

Note that all types used by the web service invoker must be simple types. This means that if you want to work with web services and use complex types you would have to call web services from codelets.

Using a timer for the timeout of manual tasks

Using a timer for the timeout of manual tasks robert Mon, 03/09/2015 - 17:32

A common problem is the coordination of several parties. We want to give a number of participants the chance to comment on something but we do not want to wait indefinitely.
YAWL timer tasks can help here.

For the following workflow, we will be using the ybkp-File which is attached.

Someone submits a claim and several specialists comment on it before a decision is prepared. The specialists only have a limited time to comment.

We start a new net with string type net variables claim, healthComment, houseComment, and lifeComment. We add a boolean type net variable accept. The task Submit claim takes claim as input and output variable and is offered to the role claimer. The task Comment on health has the claim as input variable and  healthComment as output variable. It is offerd to the health specialist. It times out two minutes after enablement (PT2M).

To set the timer first click on the task which should contain the timer. Now is on the left hand of the editor the properties table there you will find the entry "Timer". At the following picture you see how you set the timer

Timer

The other two commenting tasks are similar.

The task Decide takes the claim and the comments as input and accept as input and output variable. This task is offered to the role allocator.


Applying extended attributes to elements of complex types

Applying extended attributes to elements of complex types ahense Sat, 06/02/2018 - 16:33

In YAWL extended attributes cannot be applied directly to single elements of complex types. Let us assume that we want to display the "Comment" element of the "candidateType" as a text area.

<xs:schema xmlns:xs="http://www.w3.org/2001/XMLSchema">
  <xs:complexType name="candidateType">
    <xs:sequence>
      <xs:element name="Name" type="xs:string" />
      <xs:element name="Phone_number" type="xs:string" />
      <xs:element name="Comment" type="xs:string" />
    </xs:sequence>
  </xs:complexType>
  <xs:complexType name="candidatesType">
    <xs:sequence>
      <xs:element name="Candidate" type="candidateType" minOccurs="1" maxOccurs="unbounded" />
    </xs:sequence>
  </xs:complexType>
</xs:schema>

We will demonstrate a way to solve the problem in task "Interview_candidate" of the as in the next screenshot:

Interview

The input mapping of task variable "Name" is

/Do_interview/candidates_Item/Name/text()

Variables "Phone_number" and "Comment" are treated in a similar fashion. The output mapping of task variable "candidates_item" is

<Name>{/Interview_candidate/Name/text()}</Name>
<Phone_number>{/Interview_candidate/Phone_number/text()}</Phone_number>
<Comment>{/Interview_candidate/Comment/text()}</Comment>
 

Task variable "candidates_item" is hidden using an extended attribute. Task variable "Comment" has an extended attribute "Text area". The specification is attached.


This solved my problem. Thanks a lot for the detailed tutorial!

Using Multiple Instance Tasks

Using Multiple Instance Tasks ahense Tue, 12/08/2015 - 13:28

Net

This tutorial illustrates the use of multiple instance tasks.

Imagine a company in the process of selecting candidates for a position. There is a task of editing the list of promising candidates when the applications are evaluated. After this is finished, a task for each candidate of the list should be created. Each task should record the results of an interview by phone. These interview tasks should be offered to all staff in the HR department.

We define the following types for candidates in the specification's data definitions:

<xs:complexType name="candidateType">
   <xs:sequence>
      <xs:element name="Name" type="xs:string"/>
      <xs:element name="Phone_number" type="xs:string"/>
      <xs:element name="Comment" type="xs:string"/>
   </xs:sequence>
</xs:complexType>
<xs:complexType name="candidatesType">
   <xs:sequence>
      <xs:element name="Candidate" type="candidateType" minOccurs="1" maxOccurs="unbounded"/>
   </xs:sequence>
</xs:complexType>

We declare a net variable candidates:candidatesType. We use this variable as input/output in task "Edit candidate". We also pull this variable into the MI-task "Interview candidates". Then we click on the button "mark as MI". If all is correct the variable is renamed "candidates_item" (see screenshot).

Editor

If we now click on the input mapping we see that the following splitter query has been created:

for $s in /candidates/*
return <candidates_Item>{$s/*}</candidates_Item>

The joining query in the output mapping looks like this:

for $j in /Interview_candidates/Candidate
return $j

The last task is called "Check candidate list" and takes the net variable candidates as input.

Now let's not touch anything and see if it works. We upload the workflow, start a case and assign the first tasks to an existing participant.

The complete spec is attached below.

Dynamic Instance Creation

Next we will explore how dynamic instance creation works. For this purpose, we open the attached spec in the editor, select "Interview candidates" and set the checkmark in the MI-attributes as show here.

We save the spec, start a new workflow, and fill in two candidates.

Next we fill in the first interview form.

In our started queue, we click the button "New Instance".

The next dialoge comes up. We have to fill in the correct XML elements.

We can now edit the corresponding work item.


Advanced track

Advanced track robert Sat, 11/08/2014 - 21:38

Backup a running YAWL system

Backup a running YAWL system fmannhardt Thu, 04/19/2012 - 03:07

Introduction

YAWL is build out of several independent web services. The two most important web services of a YAWL system are the YAWL Engine, responsible for actual workflow execution and state management, and the YAWL Resource Service, that manages information about the organisation (participants, roles, positions, etc.) and stores the work queues for each participant.

In almost every use case of a workflow management system like YAWL, it is crucial to retain the state of all managed workflows in any case. Usually there are multiple long-living workflows inside the system, loosing information about their state leads to a lot of work and may even result in restarting the case from scratch. Unfortunately every system may crash due to e.g. undiscovered errors, hardware failure or power outage. Then it should at least be possible to roll back the whole system to a consistent state some time before the crash occured.

Therefore a consistent backup of the complete YAWL system should always be kept at a safe place. Please note that this backup must contain the data of all YAWL web services (e.g. Engine and Resource Service) at the same state. For the scope of this article we assume those services all store their data to the same database, called YAWL database. Please note that within the standard configuration of YAWL this is the case.

Backup Database

Depending on your Database Management System (DBMS) there are different ways of doing a consistent backup of a running system. Depending on the available resource for each DBMS the process is described in detail or it is refered to external tutorials.

Backup Log-Files

YAWL offers an integrated logging feature via Log Predicates that can be assigned to tasks, conditions and (sub)-nets. If you don't use this feature, you may skip this section. But especially when a consistent state across distributed external systems is needed, YAWL logging could be very useful. (See below in section additional thoughts)

Additional thoughts

  • If a YAWL workflow interacts with external systems, such as the company’s web services or databases, the situation gets more complicated. Even though it is possible to create hourly backups of YAWLs internal state, rolling back to a consistent state across different distributed systems is far away from trivial. Maybe the logging feature of YAWL can be used as a starting point to recover those information in a case of failure.

  • There is already a PostgreSQL backup script available in the YAWL Wiki at code.google.com.

Backup Microsoft SQL Server

Backup Microsoft SQL Server fmannhardt Thu, 04/19/2012 - 03:14

Introduction

In Microsoft SQL Server there exist two models of doing a backup:

For our purpose, backup the YAWL database on a live production system, the first model is well suited. There is further information available at Microsoft MSDN.

Backup MySQL

Backup MySQL fmannhardt Thu, 04/19/2012 - 03:09

Introduction

In MySQL there is a tool called mysqldump available. To get a consistent backup you need to use the InnoDB storage engine and specify the mysqldump option --single-transaction. The backups generated by mysqldump contain the complete SQL code to recreate the YAWL database.

Backup

For example a full backup of all databases with MySQL is get by:

mysqldump --all-databases --single-transaction > yawlDatabase.sql

To backup only your YAWL database, you can specify the name (usually "yawl") by:

mysqldump --databases yaug --single-transaction > yawlDatabase.sql

Restore

To restore the YAWL database please first shutdown all running YAWL services. Then issue the following command:

mysql < yawlDatabase.sql

You may also supply username and password of a database user.

YAWL generated process log analyzed with Disco

YAWL generated process log analyzed with Disco mstamm Sat, 07/11/2015 - 00:27
YALW - Meal Workflow

In the context of our university project, “Process Mining” at Hochschule Bonn-Rhein-
Sieg
,  we  are  executing  processes  with  YAWL  and  using  Disco  to  analyze  the
process logs. Please read the whole article here YAWL generated process log analyzed with Disco.
 
In  this  article  we  are  describing,  how  we  analyzed  a  compact  YAWL  generated
process  log  with  Disco. First  of  all  we  like  to  explain  the  YAWL  process  and  the
analysis of the resulting process log  with Disco. (MealWorkflow.yawl, Meal Workflow process log and Disco project resources)

Furthermore, we will describe our self-written java tool for replacing YAWL generic resources.
(Download java tool: https://drive.google.com/file/d/0B6VLBli5s2MqSW9uMlFueGIxeUU/view?pli=1)

Attachment Size
YAWL generated process log analyzed with Disco (432.72 KB) 432.72 KB
MealWorkflow.yawl (15.19 KB) 15.19 KB
Meal Workflow process log and Disco project resources (35.25 KB) 35.25 KB

Creating and using Codelets

Creating and using Codelets ahense Mon, 02/20/2017 - 09:05

In this tutorial we show in three steps how to work with codelets in YAWL. We first create a codelet, install it and then invoke it from a YAWL workflow. We assume that you are familiar with editing and running workflows in YAWL.

Create Codelet

In the attached zip file you can find a codelet RandomNumberCodelet.java. In order to compile it you need the YAWL library jars from here:

https://github.com/yawlfoundation/yawl/releases/download/v4.1/YAWL_Libr…

Unzip and put yawl-lib-4.1.jar in your Java project. Also put jdom2-2.0.5.jar in your Java project (both jars are also in the zip file).

Compile the RandomNumberCodelet.java.

Install Codelet

Put RandomNumberCodelet.class  in /opt/codelets/codelet - you can choose any other directory here. Open file

../YAWL-4.1/engine/apache-tomcat-7.0.65/webapps/resourceService/WEB-INF/web.xml

and change the following parameter accordingly:

    <context-param>
        <param-name>ExternalPluginsPath</param-name>
        <param-value>/opt/codelets</param-value>

Run Codelet

Start the YAWL engine and load codeletInvocation.yawl into the YAWL editor. Run the workflow and see if a random number is displayed in the third task.


codeletFiles.zip (2.48 MB)

YAWL and LDAP

YAWL and LDAP ahense Wed, 01/13/2016 - 11:10

treesOrganisational data, user names and passwords are at the centre of the resource perspective of workflow management systems. YAWL has its own organisational model, and in the standard configuration, organisational data are entered via the control centre.

In a realistic setting, the workflow management system runs in an organisation where organisational data are registered in a central directory. The standard used here is the Lightweight Directory Access Protocol or LDAP for short. YAWL is an LDAP-enabled application in the sense that it can be configured to obtain its organisational data from an LDAP directory.

In this short tutorial we show how to configure YAWL to use an LDAP directory. Using a real-life directory can be challenging because of security aspects built into these systems. In order to see how YAWL can be connected it is easier to install an LDAP server for testing purposes locally. An excellent introduction on how to install OpenLDAP on an Ubuntu Linux is contained here:

Butcher M. Mastering OpenLDAP: Configuring, Securing and Integrating Directory Services. Packt Publishing; 2007.  

We assume now that you have installed your own LDAP server or that you know how to access a production server.

YAWL has two files where LDAP can be configured:

.../engine/apache-tomcat-7.0.55/webapps/resourceService/WEB-INF/web.xml

.../engine/apache-tomcat-7.0.55/webapps/resourceService/WEB-INF/classes/LDAPSource.properties


In the web.xml file you must set the value of the parameter OrgDataSource to LDAPSource. And you must set the parameter ExternalUserAuthentication to true.

The file LDAPSource.properties must be adapted to the LDAP server you want to connect to. The file that is shipped with YAWL is well documented and consist of two parts. In the first part, the connection parameters are set. In the second part, the properties of YAWL are mapped to LDAP attributes. We have mapped the roles attribute to employeeType in LDAP:

# Roles Attributes
# the name of the Role attribute name.
roles=employeeType


If everything is configured correctly, you should be able to see the LDAP users in the control centre.

Using Worklets and Exlets to reduce Workflow Complexity

Using Worklets and Exlets to reduce Workflow Complexity ahense Tue, 10/18/2016 - 15:51

Motivation

If you want to explain the essence of a procure to pay workflow you might want to use a diagram like this one:

It shows the "sunshine path" of a process where a request is created by a requisitioner (red), the request is approved by a manager (orange), a purchase order is created by a buyer (yellow), and the goods are selected, shipped and invoiced by a supplier (blue). The requisioner receives the goods and the buyer receives the invoice. Finally, the invoice is payed by accounts payable (blue).

It may happen of course that the request is not approved, that goods are not available or that there are complaints after the reception of the goods or the invoice. If we add this behaviour to the diagram above we get something like this:


Although the control flow is depicted here in a very direct way, we lose some of the simplicity and clearness of the original approach. In this tutorial, we will show how the original diagram can be directly used for an implementation that accounts for all the special cases. This can be done by using worklets and exlets.

Developing the solution step by step

The first thing we will add now is a differentiation of the task “Approve request” according to the Max_price:


Rules for task Approve Request
Condition Action Worklet
Max_price < 500 No approval ApproveAutomatically
500 <= Max_price < 10.000 Approval by manager -
10.000 <= Max_price < 100.000 Approval by senior manager ApproveSenior
Max_price >= 100.000 Approval by a manager and a senior manager (four-eyes principle) ApproveTwo

In order to do this we have to write and upload the worklets and then create an RDR-tree like this:

Next we want to notify the requester if the request has not been approved and then cancel the case. Since the compensating action is done in a worklet, we cannot use the retain familiar facility of the editor. We must store the userid in a variable and pass it to the worklet. This can be done with a codelet called “TaskCompleterInfo” that comes with the YAWL distrubution.

We will first create a worklet called “CreateRequestWorklet” that will always be used. It serves for hiding the technical task “Store completer of WI”.

Once we have this done we can crete a Workitem post-constraint violation rule. The actions suspend case, compensate by “NoteRejection” and cancel case are executed if the request has not been approved.

We do the same thing for tasks “Create purchase order” and “Select goods”, i. e. notify the requester in case something is not available and cancel the case.

If the goods received are not ok we want to return them and notify the supplier of this fact. For this purpose, a worklet “Return goods” is created that does this.

Furthermore, the SupplierID must be stored as well. This requires another worklet “Select goods worklet”.


Overview of the results

The next table shows an overview of all worklets and how they are linked to the specifications. The information is persisted in the files ProcureToPay.xrs and Return_goods.xrs.


Specification

Task

Rule type

Worklet

ProcureToPay

Create request

Selection

CreateRequestWorklet


Approve request

Selection

ApproveAutomatically


ApproveSenior


ApproveTwo


WI post-constraint

NoteRejection


Create purchase order

WI post-constraint

NoteRejection


Select goods

Selection

Select_goods_worklet


WI post-constraint

NoteRejection


Receive goods

WI post-constraint

Return_goods


Receive invoice

WI post-constraint

Note_complaint

Return_goods

Return goods

WI post-constraint

Note_complaint


Installation

All necessary files are attached here in a zip file. In order to install everything follow these steps:

  1. Load the Organisational data from file YAWLOrgDataExport.ybkp using the control centre.

  2. Load the specification ProcureToPay.yawl using the control centre.

  3. Load all other yawl-files as worklets using the YAWL editor.

  4. Load the rule files ProcureToPay.xrs and Return_goods.xrs using the YAWL editor.


Running the workflow

The workitems of the workflow are distributed to the following users:


User-ID

First name

Last name

Roles

req

Rudi

Quarz

Requisitioner

man1

Miro

Nantz

Manager, Requisitioner

man2

Marthe

Nox

Manager, Requisitioner

sman

Sean

Nibble

Senior Manager, Manager, Requisitioner

buyer

Berta

Ruddington

Buyer, Requisitioner

supp1

Serge

Partre

Supplier

supp2

Samantha

Picks

Supplier

ap

Amanda

Proffs

Accounts Payable, Requisitioner

All users have the password "pass".


Custom forms for beginners

Custom forms for beginners k.schildt Mon, 04/28/2014 - 15:19

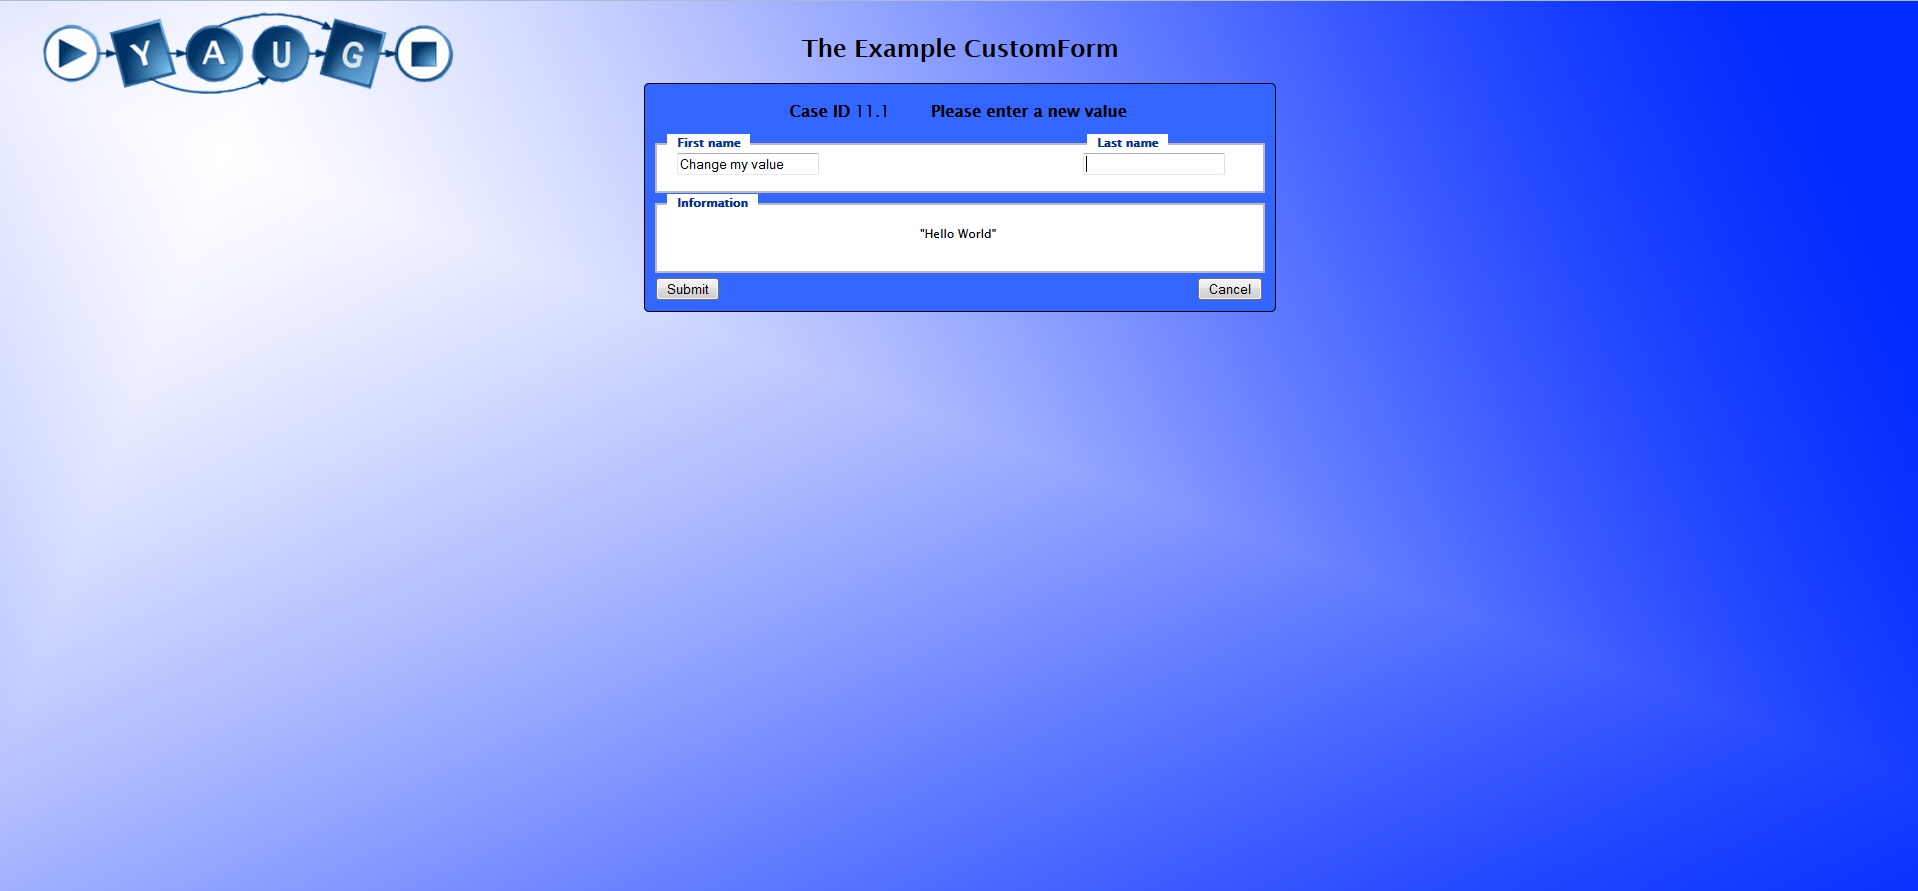
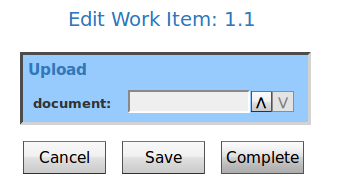
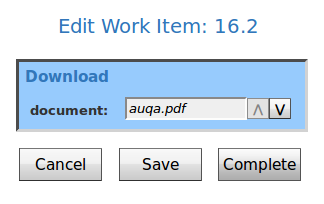
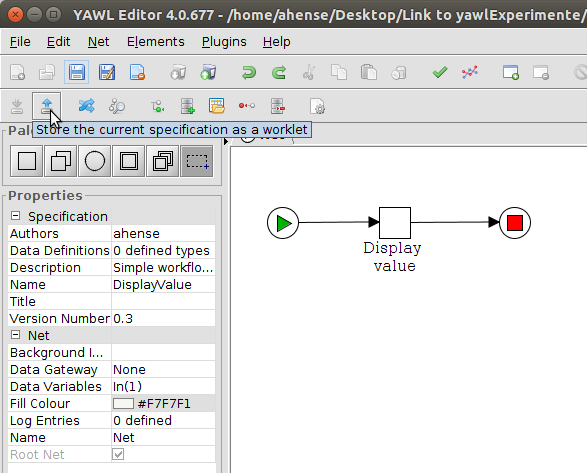
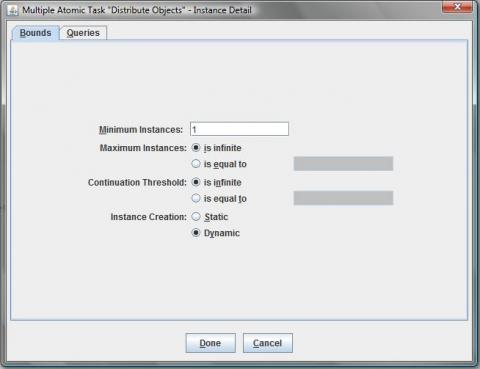
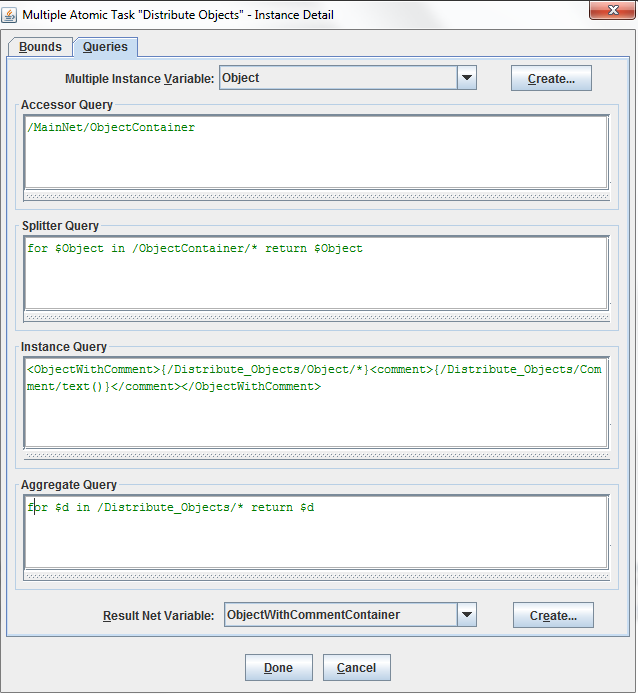
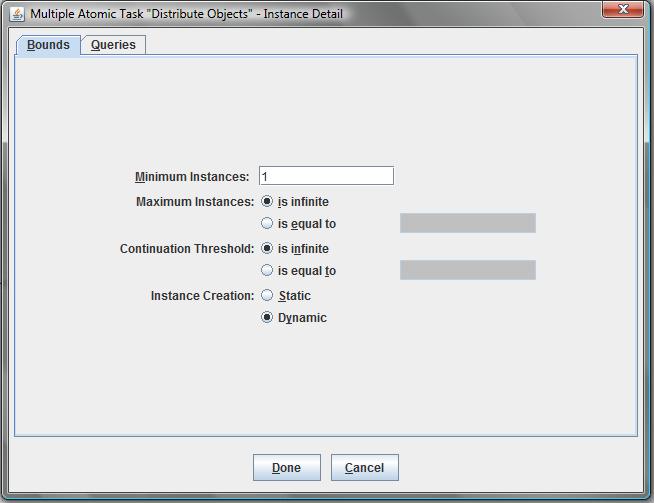
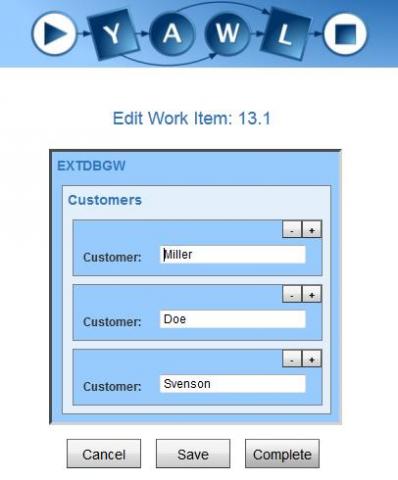
Result of  this tutorial:


Introduction

This tutorial should help you to create a custom form.

At first what you need is the YAWL Engine and you need a little bit of knowledge about HTML, Java and JSP.


Preparation

At first we begin with the example of a custom form and with a workflow for integration.

All necessary files are located in the customform folder .

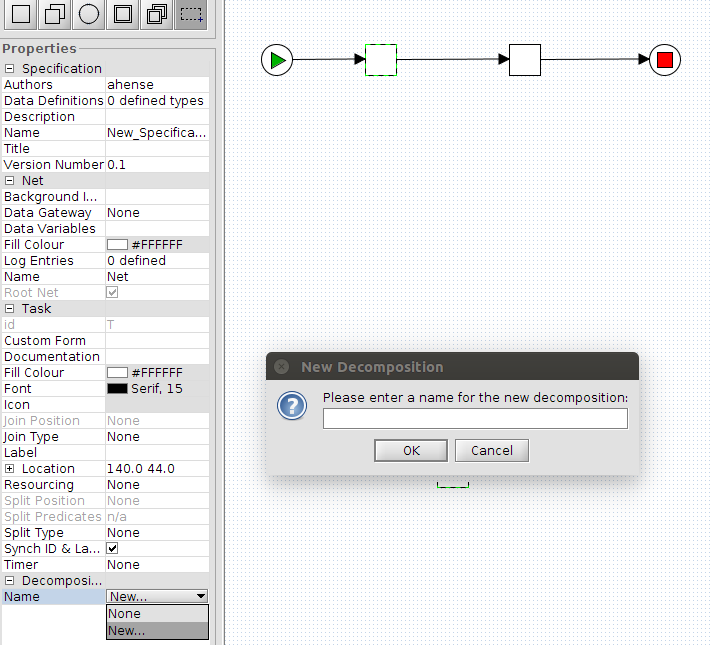
The first step is that you have one participant in your resource service. You can use your own participant or you create a new one.

The second step is to import the folder “transFormer” at the following folder at your YAWL Engine “…/YAWL4Study/engine/apache-tomcat-7.0.52/webapps”.

Later we will give you an explanation of the file “customformexample.jsp“.

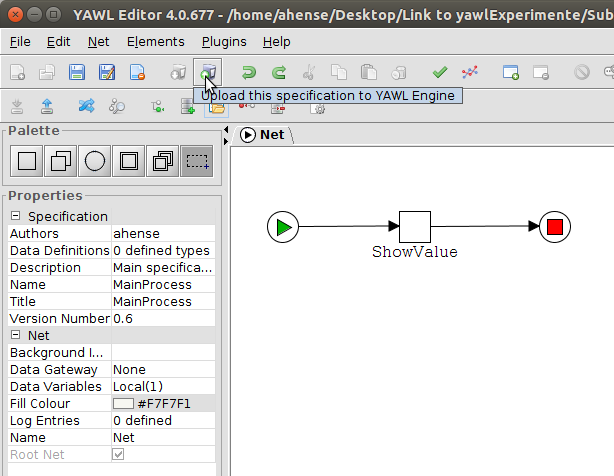
The third and last step is to upload the specification “Custom_form.yawl” to your YAWL Engine.


Workflow

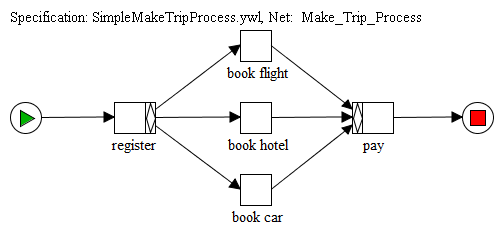
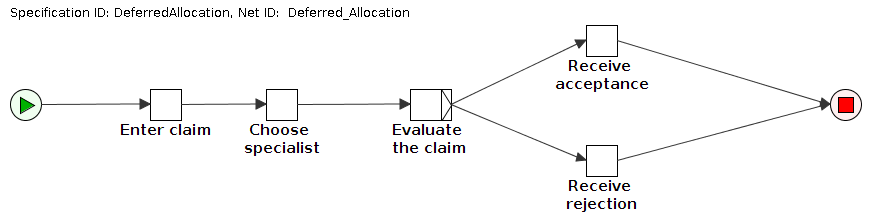
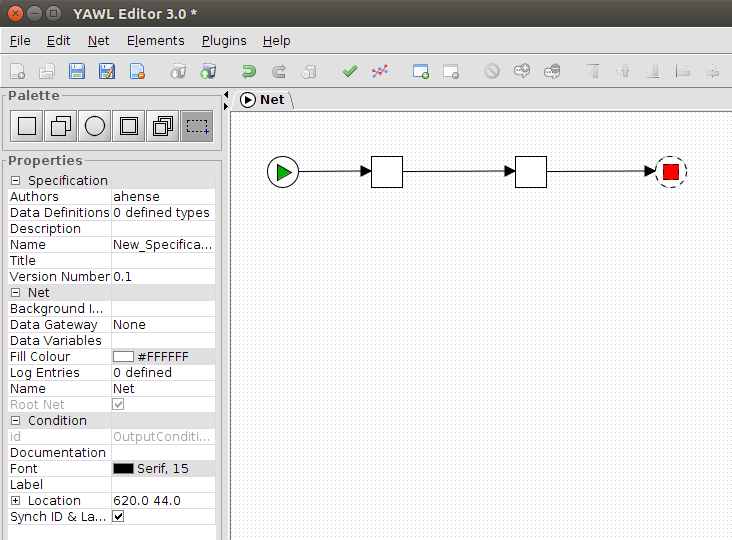
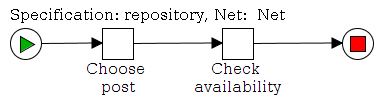
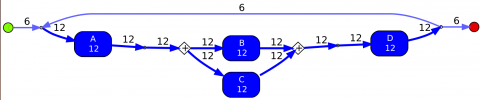
Now let’s take a look at the workflow


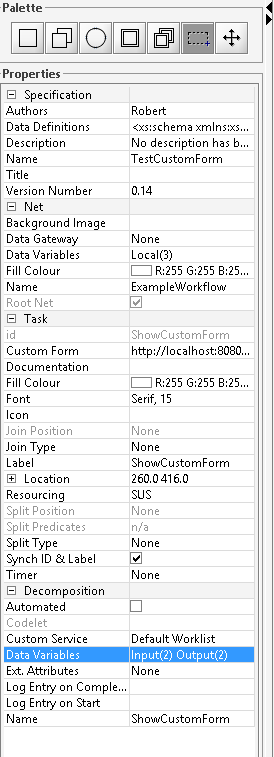
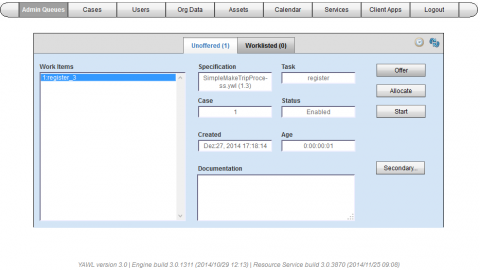
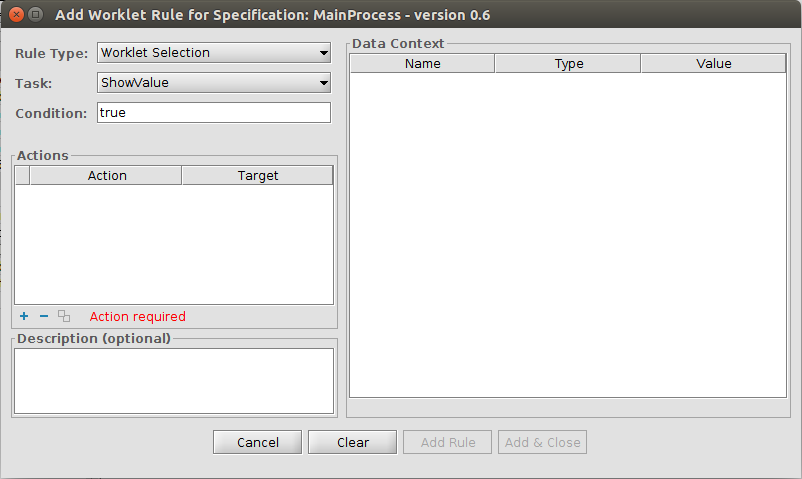
This workflow has two tasks. The first task “ShowCustomForm” has three task variables that are displayed in a custom form.


Now you have to set the destination of your custom form. In our example the location of the custom form is on the apache server of the yawl engine.

The adress of our custom form jsp-file is http://localhost:8080/transFormer/customformexample.jsp.

If you want to access the custom form from another system, then you have to change the adress to your ip-adress of your computer.


The next task “PrintValues” shows that the values are in the task “ShowCustomForm” now and the custom form really works.


Creating a custom form

The first step with the workflow is done now, we take a look at the creation of a custom form. In our example it's the file “customformexample.jsp”

To create a custom form, it is useful to use a development environment. In our example we use the development environment “Eclipse”.

Excursion to eclipse

At first we take a little excursion in creating a project in eclipse, because if you create only a jsp-file “Eclipse” doesn’t know many of your code commands.

At first we create a java project named “CustomForm” and create in the folder “src” a jsp-file named “customformexample.jsp” and we don’t use a jsp-template.

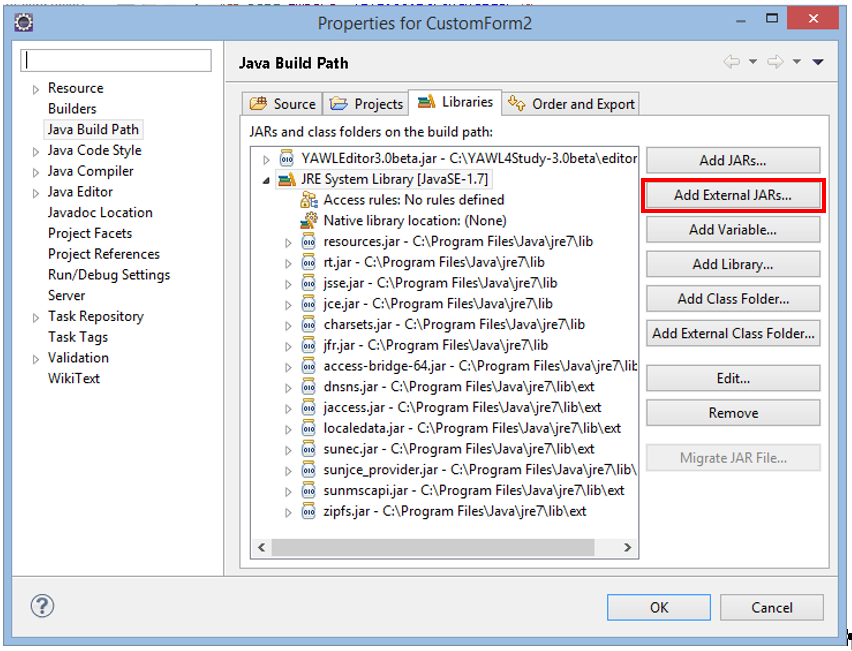
To prepare the project we right-click on the folder “JRE System-Library” select “Build Path”->”Configure Build Path”.

At the tab “Libraries”, there is a button “Add External JARs…”. Click on that and select “.../YAWL4Study-3.0beta/editor/YAWLEditor3.0beta.jar”.

Now the library of the YAWL Editor is imported to the project.

Back to the development of the custom form

Now let’s write the code “customformexample.jsp”.

Our first thing is the java code, after that we create the HTML Form, which will show to the end-user.

In order to access the java classes, we import this.


<%@ page import="org.jdom2.Element"%>

<%@ page

import="org.yawlfoundation.yawl.resourcing.rsInterface.WorkQueueGatewayClient"%>

<%@ page import="org.jdom2.output.XMLOutputter"%>

<%@ page import="org.jdom2.output.Format"%>

<%@ page import="org.jdom2.input.SAXBuilder"%>

Getting back, when ready we set the redirect URL.

String redirectURL = (String) session.getAttribute("redirectURL");

if (redirectURL == null) {

       redirectURL = request.getParameter("source");

       session.setAttribute("redirectURL", redirectURL);

}

If the cancel button has been clicked on the HTML form, we clean up any session attributes which are be set, then return to the worklist.

String submit = request.getParameter("submit");

if ((submit != null) && (submit.equals("Cancel"))) {

       session.removeAttribute("itemXML");

       session.removeAttribute("workitem");

       session.removeAttribute("handle");

       session.removeAttribute("redirectURL");


       response.sendRedirect(response.encodeURL(redirectURL));

       return;

}

To retrieve the workitem data’s as xml, we use a workqueue gateway client object. The url is the default value, if you use the apache server of the YAWL Server.

If you use another apache you have to place the “YResourceServiceClient.jar” at the same location.

String wqURL = "http://localhost:8080/resourceService/workqueuegateway";

WorkQueueGatewayClient wqClient = new WorkQueueGatewayClient(wqURL);

If the form has refreshed, it will be stored in a session.

String itemXML = (String) session.getAttribute("itemXML");

If the form is not refreshed, it gets the xml from the gateway. For that we get  the workitem id from the request and the user. In the following we set the variables "itemid" and "handle".

The itemXML contains the data of the work item and we save the three variables in a session, if the form would be refreshed.

if (itemXML == null) {

       String itemid = request.getParameter("workitem");

       String handle = request.getParameter("handle");


       itemXML = wqClient.getWorkItem(itemid, handle);

       session.setAttribute("itemXML", itemXML);

       session.setAttribute("workitem", itemid);

       session.setAttribute("handle", handle);

}


Now, we take a look in our example workflow, what we get in the itemXML to understand and what we have to do next.

<workItemRecord>

     <id>29.1:ShowCustomForm</id>

     <specversion>0.11</specversion>

     <specuri>TestCustomForm</specuri>

     <caseid>29.1</caseid>

     <taskid>ShowCustomForm</taskid>

     <uniqueid>0000000000000000000000004</uniqueid>

     <taskname>ShowCustomForm</taskname>

     <documentation></documentation>

     <allowsdynamiccreation>false</allowsdynamiccreation>

     <requiresmanualresourcing>true</requiresmanualresourcing>

     <codelet></codelet>

     <deferredChoiceGroupid/>

     <enablementTime>Apr:22, 2014 18:00:32</enablementTime>

     <firingTime>Apr:22, 2014 18:00:42</firingTime>

     <startTime>Apr:22, 2014 8:00:42</startTime>

     <completionTime/>

     <enablementTimeMs>1398182432267</enablementTimeMs>

     <firingTimeMs>1398182442892</firingTimeMs>

     <startTimeMs>1398182442902</startTimeMs>

     <completionTimeMs/><timertrigger/>

     <timerexpiry/>

     <status>Executing</status>
     <resourceStatus>Started</resourceStatus>

     <startedBy>admin</startedBy>

     <completedBy/><tag/>
     <customform>http://localhost:8080/transFormer/customformexample.jsp</customform&gt;
     <logPredicateStarted/><logPredicateCompletion/>

     <specidentifier>UID_d89a831b-b84e-4a33-8fce-bfcfa4083b87</specidentifier>

     <data>

          <ShowCustomForm>

                <var>Change my value</var>

                <var2>Hello World</var2>

          </ShowCustomForm>

     </data>

     <updateddata></updateddata>

</workItemRecord>

We see above, we get the “workItemRecord” with many elements, which we can show at our HTML Form for example “id”,”caseid”,”tasked”,...

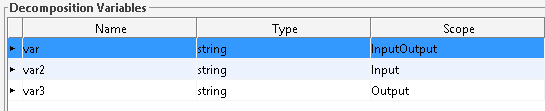
We see blue coloured the element “data” that contains the element “var” and “var2”. That’s our variables which are from the scope “InputOutput” and “Input”.

Our “var3” is from scope “Output” that’s the reason why we don’t see it as an element. We don’t use it in our example, but the element “updateddata” contains the saved values, if you implement a save button in your custom form.


Back to the code. Now we have seen above the content of “itemXML” and  we have to prepare them with JDOM. We create three objects from type Element. “wir” contains all element from the root level from “id”,”caseid”.

 If an save button exists, "updatedData" contains elements. “data” checks updatedData contains content, if that set them as content for the form or set the element “data”.


Element wir = new SAXBuilder().build(new StringReader(itemXML)).getRootElement();

Element updatedData = wir.getChild("updateddata");

Element data = (updatedData.getContentSize() > 0) ? updatedData    : wir.getChild("data");


Next we go one level down from element data this element we define as wirData.

Element wirData = data.getChildren().get(0);


If the itemXML contains an error, we have to check it and put out an error message.


String error = null;

if (!wqClient.successful(itemXML)) {

       // show the message to the user in an appropriate way. In this case, we'll

       // simply show it on the form below

       error = itemXML;

}


If the itemXML is checked, then we use the else statement. In the else item we put our individual code which is in every custom form fitted to the variables of the task.

At first we read the new values as entered on the HTML form and save it in variables and then we define the names from our variables of the task, which was be modelled in “YAWL Editor”

else {

       String var_input = request.getParameter("var_input");

       String var2_input = request.getParameter("var_input2");

       String varName = "var"; //The value with input and output

       String varName3 = "var3"; //The value with only output

Then we check it. If the values of “var-input” and “var2_input” are not null and in another then we check, if the element “wirData” is not null. In that statement we define our updated Element.

In our “itemXML” example, we see that the variable “var3” is missing, so that we have the create as node.

Important! Here we have to hold the order which is defined in YAWL Editor, that’s the reason why we define the output in the editor at last and saved us a sorting of the element “wirData”.

 Now the new Element we have to add to “wirData”. After that we check in,  if the statement  “dataitem” is not null and set the text of the variable “var” and also check if “dataitem2” is not null and set the text of the variable “var3”.


       if (var_input != null && var2_input !=null ) {

             if (wirData != null) {

                    Element dataitem = wirData.getChild(varName); // get data var

                    Element dataitem2 = new Element(varName3); //creating the node for var3

                    wirData.addContent(dataitem2);

                    if (dataitem != null) {

                           dataitem.setText(var_input); // update data var's value

                           if (dataitem2 != null) {

                                  dataitem2.setText(var2_input);


The workitem has to be updated via the gateway, with the new values. After that we check, if the update via the gateway was successful and remove the session and redirect.

                                  String itemid = (String) session.getAttribute("workitem");

                                  String handle = (String) session.getAttribute("handle");

                                  String dataString = new XMLOutputter(Format.getCompactFormat()).outputString(wirData);

                                  String result = wqClient.updateWorkItemData(itemid, dataString, handle);


                                        // check all is ok - if so, close the form

                                  if (wqClient.successful(result)) {


                                        // clean up our stored session attributes

                                        session.removeAttribute("itemXML");

                                        session.removeAttribute("workitem");

                                        session.removeAttribute("handle");

                                        session.removeAttribute("redirectURL");


                                        // now we can redirect back to the worklist.

                                        // if you want the workitem to complete when it posts back, add

                                        // the parameter below and set it to 'true'; if it's false or

                                        // missing, the workitem will update but remain on the worklist's

                                        // 'started' queue (a 'save')

                                        redirectURL += "?complete=true";

                                        response.sendRedirect(response.encodeURL(redirectURL));

                                        } else {

                                               error = result;

                                  }//closing if(dataitem !=null)


At last we close the last 'if' and give them else statements.                                                                                                  

                           //This else condition gives a feedback if the varName3 is null

                           } else {

                                  error = "This workitem does not contain a variable called '"

                                               + varName3 + "'.";

                           }

                    //This else condition gives a feedback if the varName3 is null

                    } else {

                           error = "This workitem does not contain a variable called '"

                                        + varName + "'.";

                    }

             } else {

                    error = "This workitem does not contain any data for updating.";

             }

       }

}


HTML Code

Finally, for the web layout we need the html code. Per html it's possible to set the workitem page to their wish.
For each work item page that has same layout, you can implement a css-file in the html code.

In the following, we declare the HTML code and at which point we can implement the css-file.


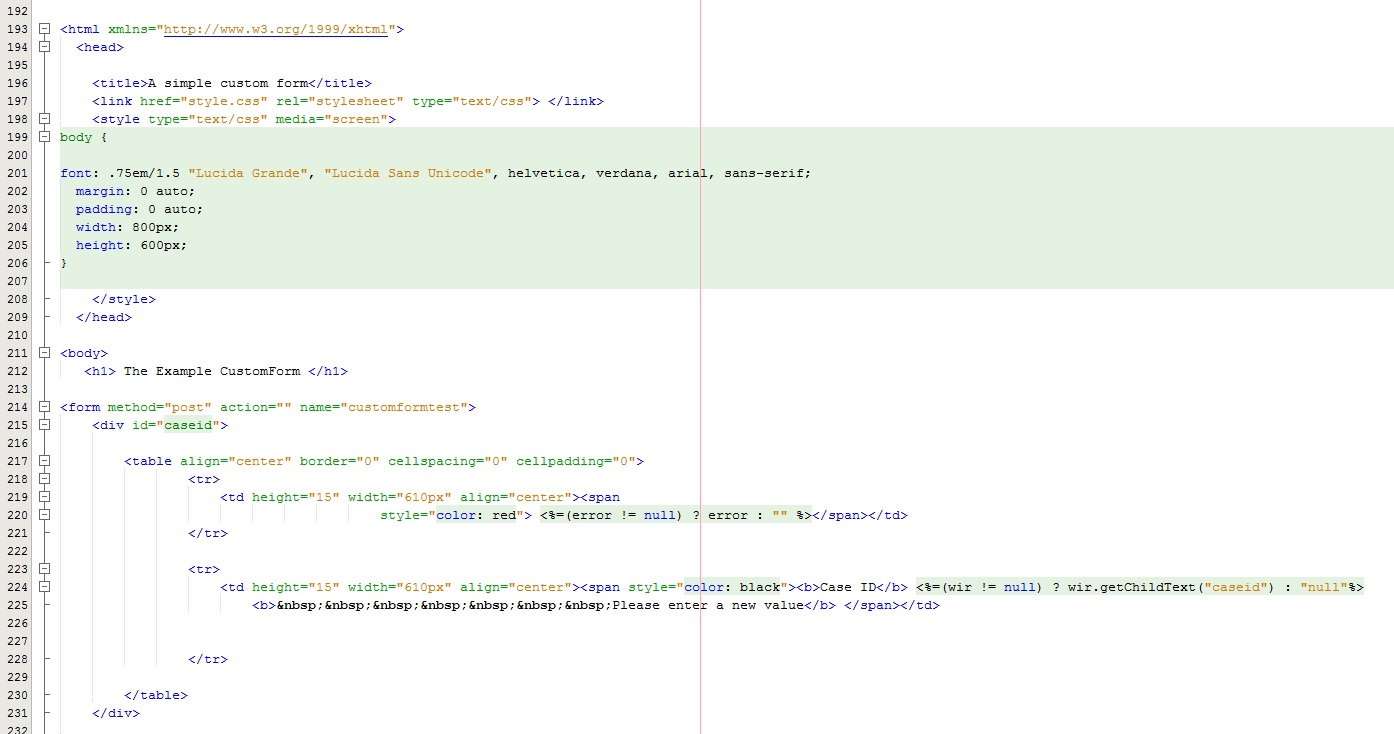
HTML code first part

At first we determine the title of the html document. This is displayed only on the edge of the browser. Directly under the <title>, we  integrate the link to our "style.css" document.

In order for our html-code can retrieve the settings of the css-document now.

We set the size of the website and the font (in this example) in the head part.

After the <head> part, we start with the <body> for set the specific website structure.

In our example, we use the html command <h1> for our headline.

So that the html code assigned to the settings in the css file, we assign for each pattern piece a fixed id.

The css file references namely to the id. After the header, we want to show the case id and a work instruction. For this we create a table with <table> ( for more variety of our commands).

The the first row <tr> should show the output of Error, if there is one.  In the second row comes the work instruction. The command &nbsp; is used to get a space command.

In the <td> command can you set the width heigth and align for the specific column.


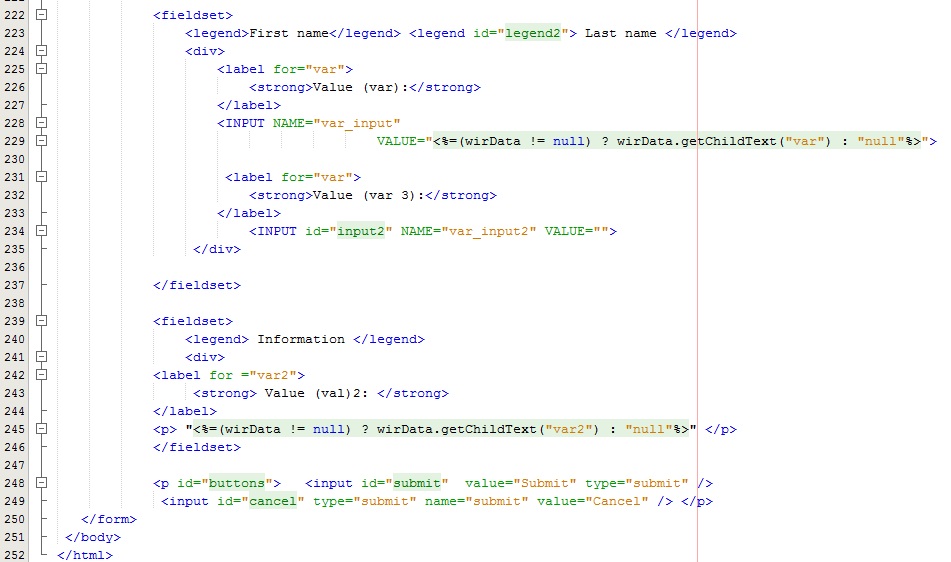
HTML code second part

As next, we divide the parameters into two fields with command <fieldset> . The input values are placed in the first field and the retrieved values in the second field ​​.

The fields we can declare individually with the  <legend> command.

In order to address the individual variables in the rows, we use the command <label>( In this example, we disabled the labels and use the legends for a fictitious example layout). With a unique label or an id, is the variable area for the css-file clearly identifiable.

After both fields, we implement the save and cancel buttons. For that we need the <input> command with the type of "submit".


If you have further questions, feel free to comment.


(Notice: This tutorial was created with build version 3.0beta.)
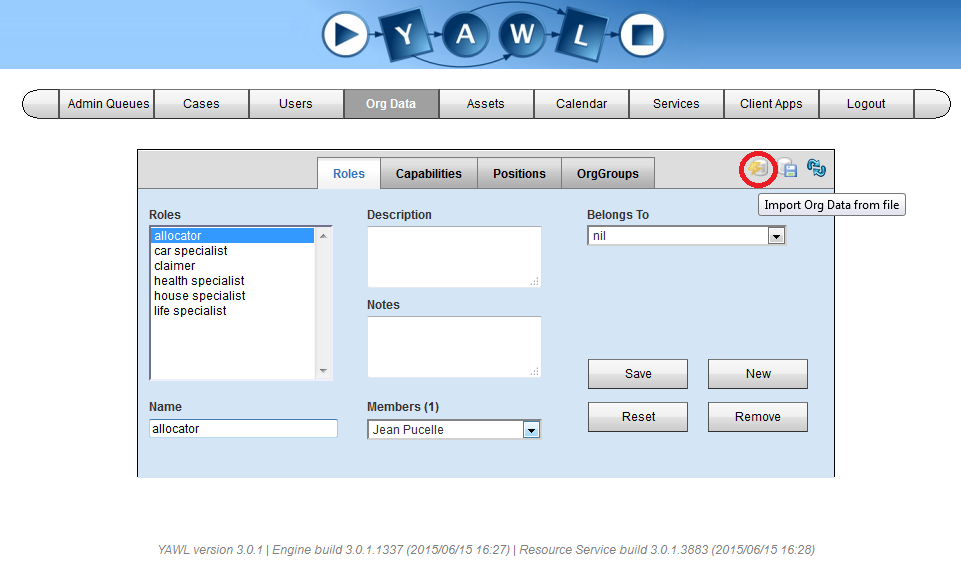
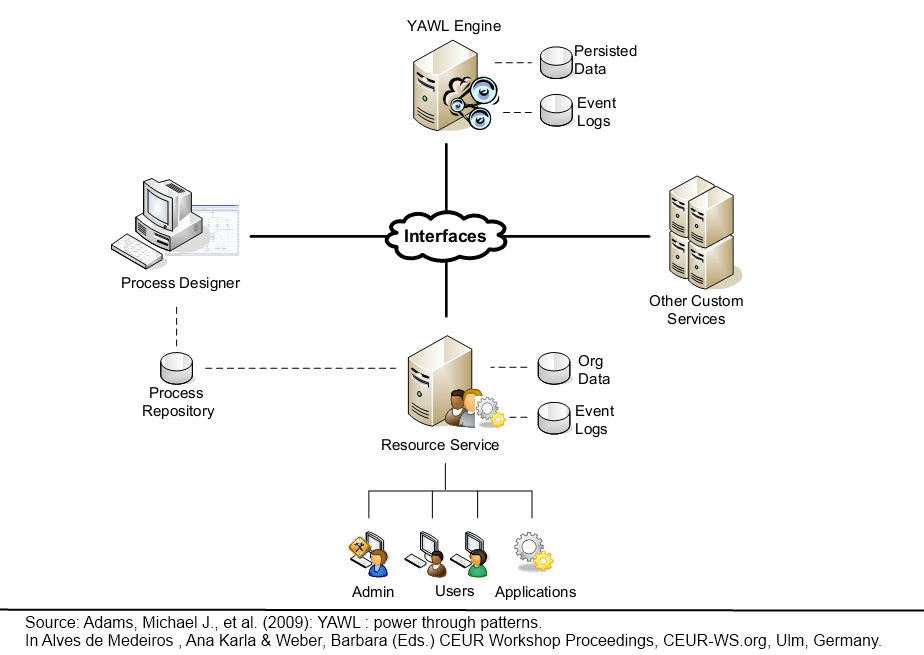
custom form.zip (68.55 KB)

Using YAWL 3.0 Repositories (part two)

Using YAWL 3.0 Repositories (part two) ahense Fri, 10/03/2014 - 17:57

In a previous tutorial we showed how to use the repository of YAWL 3.0 for extended attributes. We now want to use the complete workflow of that tutorial in a new workflow as a subnet. We use the repository functionality for that.

The first thing we do is to load the workflow attached to the previous tutorial into the editor and use the net menu to store it in the repository. We also store the datatype definition in the repository.

Then we close the specification and create a new one. We first load the datatype definition from the repository.

In the new specification we load the previous specification from the repository and rename the resulting new subnet "Check post".

Now we go to the root net and connect the subnet to the composite task - the label may have to be adapted.

We proceed by defining a net variable fName:string and by defining postDesc and avail for receiving values from the subnet "Check post". We open the data variable dialog for the composite task and get this:

We change the decomposition variables postDesc and avail to scope output.

We define task Register with fName as output variable and tasks Note rejection and Note acceptance with fName and postDesc as input variables.


Testing the workflow shows that the mappings in the subnet are broken.


Two questions remain to be answered. Where is the repository stored? How can I save my repository?

The repository is here ../YAWL-3.0/editor/repository. There are a number of XML files with descriptive names. These files can be saved for future use and can be restored. A good idea seems to be to create one repository for each project.


Stylesheet for removing double complete events in YAWL XES logs

Stylesheet for removing double complete events in YAWL XES logs ahense Sat, 02/04/2017 - 16:34

YAWL creates XES logs directly from the control centre. This makes it easy to do Process Mining with tools like ProM, Disco or Celonis. There is however a little problem: YAWL creates "complete" events twice for every work item. This can be seen in file processMiningSimple0.1.xes in the attachment.

We have created an XSL sheet that removes these double "complete" events. When you apply this like this

$ saxon-xslt processMiningSimple0.1.xes transform.xsl > processMiningSimple0.1.removedDoubleComplete.xsl

you obtain the file processMiningSimple0.1.removedDoubleComplete.xsl which has been uploaded into ProM, filtered on simple heuristics and displays the process model in this picture.

promGraph

files.zip (7.84 KB)

Reusing YAWL specifications as subworkflows (YAWL 4.0)

Reusing YAWL specifications as subworkflows (YAWL 4.0) ahense Sat, 04/23/2016 - 11:19

YAWL 4.0 features an integrated worklet editor that makes the work of  a previous tutorial much easier. Our goal here is to use the worklet service to create a subworkflow that can be reused in many specifications. In order to demonstrate this, we will create two YAWL specifications. MainProcess.yawl is the specification for the workflow that will call the subworkflow. DisplayValue.yawl is the one that will be called. You can find the specs attached below. Let us now start step by step.

Upload the Worklet

Make sure that your YAWL editor is connected to a running YAWL engine. Open DisplayValue.yawl in your YAWL editor and store it as a worklet.

Add a Rule to the Main Workflow

Close this specification and open MainProcess.yawl. Then add a rule to this specification.

The rule type must be set to "Worklet Selection". The task must be set to "ShowValue". Note that the custom service in the decomposition of task "ShowValue"  must be set to the worklet service (this is already the case in our specification).

The condition is set to the constant "true" because we always want to use the same worklet.

In the "Actions" section we have to select the action "select" ...

and choose our worklet DisplayValue as the target.

Now the dialogue should look like this.

We click "Add & Close" and hopefully get the following message of success.

Export the Rule Set

This step is optional. Exporting the ruleset allows you to reuse it later in another YAWL engine. There is a button for exporting the rule set.

The following selection dialogue appears. Note that the rule set is associated to the specification and its version.

Store the file MainProcess.xrs somewhere. It will look similar to this.

The main process is identified by its name, its version, and its unique identifier. The worklet is identified by its unique identifier only.

Deploy the Workflow

Next we will upload MainProcess.yawl using the button in the editor.

Now we are ready to test if it works. We start a case for MainProcess and assign the workitem ShowValue to some existing user. When the user views the work item it should look like this:

It is important that it says "Display value". If it says "ShowValue" it is not the worklet but the default behaviour of the MainProcess that is displayed.


Working with Data Gateways

Working with Data Gateways ahense Sun, 03/01/2015 - 15:42

This tutorial is written for YAWL 4.x and replaces a previous tutorial for YAWL 2.3.

In addition to using net variables in YAWL we can also store and fetch data directly from a database. In this tutorial we show how to retrieve data from a simple database table using a YAWL Data Gateway. In the previous tutorial for YAWL 2.3 Microsoft database was used. Here we will demonstrate the case with PostgreSQL. We assume that you are familiar with the basics of databases and have installed PostgreSQL and pgAdmin.

We start by creating a new database with name "CustomerDB" and owner "postgres" having password "postgres". In this database we create a table "Customers" with owner "postgres". We create columns ID:integer (primary key), Name:text, Age:integer and fill it with some data:

tableContents

When we click on the magnifying glass symbol in pgAdmin while table "Customers" is selected we get the SQLeditor. There we choose the tab "Graphical Query Builder", navigate to table "Customers", select "Name" and "Age", and click on the green triangle. We should get the following query:

SELECT
  "Customers"."Name",
  "Customers"."Age"
FROM
  public."Customers";

Now we create a new Java project named "yawlDataGateway" in Eclipse or Netbeans. We download the YAWL Library Jars, unzip them and add the yawl-lib-4.2.jar and YResourceServiceClient.jar to the build path. Furthermore, you need jdom-2.0.6.jar and hibernate-core-4.3.11.Final.jar in the build path.

The code of the class MyExternalDBGatewayImpl is attached here. We deploy yawlDataGateway.jar to ../webapps/yawl/WEB-INF/lib. We restart the YAWL engine and the editor.

We build a simple YAWL workflow as attached here. If everything works correctly, it should look like this:

showCustomers


The Java code is a quick hack - not very robust. Who has a more elegant solution?

riyaz.lakhani

Fri, 07/10/2015 - 13:32

Hi Ahense,

I am getting below error (screenshot attached) while using same .yawl or .java file to retrieve data using Data Gateways.
1.Error_in_browser.JPG
When I am loading (same) dataGateway.yawl

2.Yawl_Specification.jpg
- Java class name is available under Data Gateway properties
-Suggest us location to put .class file (if any fixed location)

3.Error_in_Mapping.JPG
Error while binding

Referring same tutorial suggested by you : http://www.yaug.org/content/working-database-gateways
YAWL Version:3.0.1

Thanks in advance for your help
Riyaz

I get the same "not found" error when the compiled jar file yawlDataGateway.jar (here included in dist.zip) is not in the right place. This file goes to .../webapps/yawl/WEB-INF/lib.

Furthermore, the data gateway is not used at net level as in your screenshot but on task level as below.

data binding

dist.zip (3.53 KB)

Hi all,

Sorry for reviving this thread, but I have tried the ahense's solution and it didn't work. The compiled file is in the right directory, and I haven't used the data gateway at net level. But I am getting the same error that riyaz.lakhani. I don't know what I am doing wrong.

Any help would be great.

Hi,

you are welcome to revive this thread. Could you tell me the versions of 

  • YAWL
  • Operating system
  • Java

you are runing?

We had tried to use data gateways in a productive setting and found that in our case using codelets was the better option. If you want to try codelets for storing data in a DMBS you can have a look at the following Youtube tutorials:

There is also a link to the supplementary material on github in the videos. Let me know if this works for you.


YAWL Data Gateways With Hibernate

YAWL Data Gateways With Hibernate ahense Mon, 09/30/2019 - 17:00

In many cases, we want to persist entities occurring in workflows in a relational database. YAWL has a mechanism called Data Gateway allowing us to store and fetch data directly from a relational database without using net variables.

In this tutorial, we show how YAWL Data Gateways and Hibernate can be used in conjunction. We perform these steps:

  1. Create a relational database in PostgreSQL.
  2. Write a YAWL Data Gateway using Hibernat.
  3. Specify a YAWL workflow to use the Data Gateway.

Create a relational database in PostgreSQL.

We create a database "messagerepository" owned by user "postgres" with password "postgres". We create a table "message" with two columns using the attached "sqlScript". When filled with values the table will look like this:

filled table

The idea here is that messages will be created by the user during the execution of the workflow cases and that the unique id will be generated by Hibernate.

Write a YAWL Data Gateway using Hibernate.

The following code has been adapted from a Hibernate course by Peggy Fisher.

We are using Netbeans as an IDE. We import the Netbeans project from yawlDataGatewayHibernate.zip and add the attached jar-files to the Libraries. The resulting project should look like this:

Netbeans project

After successfully building the project, there should be a file called yawlDataGatewayHibernate.jar in the "dist" folder of Netbeans. This file should be copied to the YAWL-4.2/engine/apache-tomcat-7.0.65/webapps/yawl/WEB-INF/lib folder. This allows YAWL to retrieve the Data Gateway called "MyDBGatewayImpl".

Specify a YAWL workflow to use the Data Gateway.

Now we create a simple workflow specification like this:

The specification


In the first task, the user enters a message text like this:

The first form


This message text is directly stored in the database table "message" using Hibernate. In the second task, all messages stored so far are displayed like this:

The second form


RPA Tutorials

RPA Tutorials sremp Mon, 03/02/2020 - 15:00

How to use Robotic Process Automation within YAWL #1 - Setup and basics

How to use Robotic Process Automation within YAWL #1 - Setup and basics sremp Fri, 02/28/2020 - 16:34

YAWL 4.2.x

Selenium WebDriver 3.1x

(It should be compatible with newer versions)

Attached files:

  1. The Codelet which contains the RPA script called “FirstTutorialsCodelet.jar”
  2. The GeckoConfig.xml which contains the path to the WebDriver, packed within “.GeckoConfigYAWL”-directory
  3. The YAWL-net “Tutorial1_SearchForData
  4. The GeckoDriver itself (can be downloaded on projects page)
  5. The Codelets source code
  6. The YAWL organizational data "YAWLOrgDataExport"


1 Motivation

Robotic Process Automation describes different technologies that operates on graphical user interfaces and imitate human interaction with such interfaces. There are plenty of approaches how to use RPA in an industrial context. Besides the big market leaders like UiPath or BluePrism there are some free and open source RPA tools like Argos Labs or Automation Anywhere. But as good as these tools are for their main purpose, most of them lack in their ability to integrate the opportunities given by Robotic Process Automation into an industrial established workflow automation system.

With that in mind I would like to present you an approach to automate web-based Business Processes through a combination of Workflow Management and Robotic Process Automation. For this approach I will use the profound researched open source Workflow Management System YAWL and Selenium WebDriver, which represents an open source framework for different programming languages to automate the interaction with a web browser.

In the following weeks I will present you a partwise tutorial on how to set up the right environment for reproducing this approach, as well as how to create own workflows and RPA scripts.  In today’s Part I will demonstrate you how to use Selenium WebDriver in the frame of YAWL to search for a plain text in Google.


2 Basics and set up

As you are already reading this text in a YAWL specific user group, I assume you are familiar with the basics of workflow automation and YAWL. If not, I would advise you to visit the YAWL Foundations website http://www.yawlfoundation.org and especially to read the YAWL user manual http://www.yawlfoundation.org/pages/support/manuals.html, which gives a very good overview about YAWL and the possibilities for a company to automate their Business Processes with this Workflow Automation System.

2.1 Codelet

If you are already familiar with YAWL, you should know that that YAWL offers a service to integrate different users into a Workflow. This can be done by the so-called Resource Service. A not so well-known fact is that you can integrate software as a resource as well by writing a Codelet.  A Codelet is a java class that is directly embeddable as an executing resource in YAWL. This is a very mighty tool and offers many opportunities for different scenarios. Because of the scope of this topic I would advise you to read Chapter “4.12.1: Codelets” (Version 4.2) in the YAWL User Manual or to visit http://www.yaug.org/content/creating-and-using-codelets&nbsp; for further information. 

Here I’ll give you a short explanation on how to integrate Codelets into YAWL. For giving YAWL the ability to find Codelets you have to change the „web.xml“ file which can be found in the YAWL installation directory „\...\YAWL-4.2\engine\apache-tomcat-7.0.65\webapps\resourceService\WEB-INF”. In this XML file you have to customize the element „<param-name>ExternalPluginsPath</param-name>“, because YAWL will use this XML element to start the search for Codelets in this given Codelet root directory. To give you an example I will show you my configuration in Windows which is built with the following Codelet root directory “C:\yawlPlugins” as follows - „<param-value>C:\yawlPlugins</param-value>“.  A not so obvious but mandatory aspect is that you must build a directory structure within the Codelet root directory according to the java package structure you have used for your Codelet. In this case, the Codelet is lying in the java package “codelet”. Because of this, you must create a directory “codelet” within the Codelet root directory. The attached Codelet must be inserted in the “codelet” directory, because otherwise YAWL could find the Codelet, but isn’t able to execute it.

The absolute path to my Codelet root directory is: C:\yawlPlugins

The path used within YAWL to find the GoogleSearchForYAWL.jar is the Codelet directory path + the java package structure + the Codelets file name -> C:\yawlPlugins\codelet\GoogleSearchForYAWL.jar

2.2 WebDriver

Because the framework Selenium WebDriver supports Java it is possible to write a Codelet in which the functionality of the WebDriver can be used directly. There are different WebDrivers for different web-browsers. For this tutorial we will use the so-called Geckodriver, with whom it is possible to automate the Firefox browser of Mozilla. An important step to get the whole approach working consists of telling the Codelet where the executable Geckodriver lies. For this step you can chose between three different options:


  1. 2.2.1 (Strongly Recommended) Tell the Codelet where the Geckodriver lies by a provided config file


There is a directory called “.GeckoConfigYAWL” with a XML file attached. You can change the given path in the XML by changing the text between the “GeckoDriverFilePath” elements. Take care that you refer directly on the executable file. This can be done independent of the operating system, just look up how your file is called and what the path of it is.


Windows example:

<?xml version="1.0"?>

<WebdriverForYAWLConfig>

  <GeckoDriverFilePath>C:\Users\Simon\Documents\geckodriver.exe</GeckoDriverFilePath>

  <RPAFilePath>

    <FilePath></FilePath>

  </RPAFilePath>

</WebdriverForYAWLConfig>


Linux example:


<?xml version="1.0"?>

<WebdriverForYAWLConfig>

  <GeckoDriverFilePath> home/Documents/driver/geckodriver </GeckoDriverFilePath>

  <RPAFilePath>

    <FilePath></FilePath>

  </RPAFilePath>

</WebdriverForYAWLConfig>


The directory with the changed XML configuration file should be in the user’s home directory, so that it is possible for the environment to find the directory at runtime.

In my Windows system the location of my folder is “C:\Users\Simon” while in my Linux system it is the “home/Simon” directory. If configured correctly your environment should have no problem to access the Geckodriver. If you followed carefully you may noticed there are more XML elements with empty values. They will be used in later tutorials to configure where RPA-scripts are lying.


  1. 2.2.2 Let the environment search for the Geckodriver in the systems path


You can use your systems path to access you gecko driver. For this you must make an entry at your system path file with a link to your Geckodriver file. All steps necessary for this can be found on following website of the Selenium developers https://selenium.dev/documentation/en/webdriver/driver_requirements/.


  1. 2.2.3 Tell the Codelet where the Geckodriver lies by a YAWL parameter


The last provided possibility to give the environment the information about the location of your Geckodriver consists of transferring the information as a string parameter directly in YAWL. As soon as you define a Task as an RPA task it automatically gets two parameters. One represents the text you are searching and the other represents the Path to you Geckodriver. You can either declare the path as a default value or transfer the path as a text at runtime. Both ways aren’t very comfortable because you need to define the path of the Geckodriver either for every RPA tasks or worse, for every RPA task in every execution. And how we like to say: don’t repeat yourself! So for getting started and “Hello Worlding” it is a pretty easy way, but it isn’t anything you want to consider for the big game.

Note that you can use all 3 options to be safe in the case of an error. The provided environment searches with every option after another until a Geckodriver file was found.

3 Organizational data

If you want to produce the same results as I  you should upload the organizational data as well. For this there is a file provided, too. It’s called “YAWLOrgDataExport”. This file should be uploaded in the YAWL control panel in tab OrgData.

4 Description


The workflow consists of two tasks. First there is a task to enter relevant data for the search and for the configuration, second there is an automated task which hosts the Codelet.

Now that you have set up everything you are ready to go for a first execution. For this upload a new case from the YAWL editor or out of the YAWL control panel. You can now login with the user “Ulfric User” or “Alfred Admin”. Their login is “uu” or “aa” and the password is “1111”. Now you can start the work item and insert a text to search for in google.  

If you used the config file or the systems path to identify the location of the Geckodriver you can ignore the lower field “Path of GeckoDriver”. As soon as you mark your work item as completed a new Firefox browser should open and execute a search in Google.

Note that the YAWL Control Center outputs some Error messages, which you can ignore for now. Second you should know you are not supposed to use you keyboard or mouse while execution the RPA script, because with this you abort the interaction and change to manual mode. Last you should keep in mind that the first execution needs some time (15-30 seconds). After this all further executions should terminate much faster (max 3 seconds).  After the execution you can just close the web browser.

5 Conclusion and outlook

In this tutorial you have seen how to set up a “hello world”-ish environment for automating interaction with google out of a workflow management system. In the next parts I will present to you how to write more complex RPA scripts and how to interact with a rich internet application.  Last I will present you how to use a provided Codelet to manage generic data transfer between the workflow management system and the RPA scripts as well as how to ensure exception management.

How to use Robotic Process Automation within YAWL #2 - Creating new RPA scripts

How to use Robotic Process Automation within YAWL #2 - Creating new RPA scripts sremp Fri, 03/06/2020 - 12:11

Welcome to the second Part of the “How to use Robotic Process Automation within YAWL”-Tutorial. Like already demonstrated in the first Tutorial, Selenium WebDriver is a great framework for automating interactions with a web browser in a Robotic Process Automation manner. In today’s tutorial I want to demonstrate you the basics of writing a Selenium WebDriver based RPA-script in the programming language Java.

The initial idea of Selenium WebDriver is to automate testing procedures of web applications. This still is the main purpose of Selenium WebDriver in software industry. Nonetheless Selenium can be used excellent for automating anything in the context of web browsers. Like they say on their website:

“Selenium automates browsers. That's it! What you do with that power is entirely up to you. Primarily it is for automating web applications for testing purposes, but is certainly not limited to just that.”

 Selenium offers two different ways to create scripts. On one side there is the already introduced Selenium WebDriver Framework, in which a developer must implement the whole execution logic by himself. On the other side there is Selenium IDE, which represents a software tool with traditional RPA functionalities, like screen scrapping user interactions with a web browser and generating an executable script for replaying the recorded interactions These functionalities are very similiar to the ones of professional tools like UiPath, like described here https://forum.uipath.com/t/why-developers-still-use-selenium-testing-tool/140651.

Unfortunately, Selenium IDE can’t be used as a complete RPA suite because the focus on testing web applications is pronounced strong in this tool and the generated scripts are optimized for unit testing. Anyway, we can use Selenium IDE for generating prototypical RPA scripts which can later be finished by a developer. This gets more interesting as employees of non-technical departments can use Selenium IDE to record their daily web application workflows to generate prototypical scripts rather than waste valuable time in describing and discussing their needs with a software developer or IT-specialist. With this methodology user and IT-departments can be relieved from overhead.


Selenium IDE is rather a straightforward application. After integrating it as an extension into a browser you can easily record further interactions with the web browser. After the recording you can customize the resulting recording. You can change the order of the execution steps, the interaction methods (html id, html class, css …) and manually insert steps like explicit wait commands for slow web applications to load.

If an interaction sequence is recorded like this there will be an exported output similar to following screenshot

As you may have noticed this is a class for automated tests in the unit testing framework Junit. Although this code is not directly usable as a RPA script, it can be transformed to one. You only must change the class into a regular java class and customize the code logic for your purpose.


For this example, I customized the Webdriver creation and deleted unnecessary methods. Depending on your needs it could be required to write new lines of code for extended logic or to add some return logic. Starting here: https://selenium.dev/documentation/en/webdriver/browser_manipulation/ you can explore the unlimited ways of automating web interaction with selenium. This way i wanted to demonstrate you what Selenium itself offers us even without integrating it in YAWL. Altogether I presented how the tool Selenium IDE can be used to generate a RPA script blueprint by an employee for a developer. But with YAWL in mind this approach isn’t satisfying at all, because there are too many ways how exceptions could occur, apart from the fact that you can hardly integrate individual data types with this approach. In the following tutorial I will present you a Codelet which gives you the ability to execute RPA scripts with self-made XML datatypes while managing appearing exceptions.

How to use Robotic Process Automation within YAWL #3 - Use a generic Codelet as Interface

How to use Robotic Process Automation within YAWL #3 - Use a generic Codelet as Interface sremp Tue, 03/31/2020 - 10:42

(At the moment Windows only, bug under Linux will be fixed)


Attached files:

  1. The Jar which contains the generic Codelet “SeleniumRPAForYAWLFinal.jar”
  2. The GeckoConfig.xml which contains the path to the WebDriver and paths to RPA scripts packed within “.GeckoConfigYAWL”-directory
  3. The YAWL-net “ThirdTutorialSearchItemInOnlineShop"
  4. The two RPA scripts BuyItemRPA.jar and SearchForItemInShop.jar
  5. The Codelets and RPAs source code
  6. The YAWL organizational data "YAWLOrgDataExport"


1 Motivation

In today’s tutorial you will see an approach on how to automate business process with YAWL and Selenium with an interface, which offers the ability to transfer individual datatypes and manages exceptions. You will get an idea of the possibilities that lies in such an approach. For this tutorial I provide you a workflow net with two RPA scripts. You will be able to search for items in an online shop an decide whether you want to put them in a basket or not. The example itself isn’t the most complicated but it will show how to integrate Robotic Process Automation into YAWL and on what points you should keep attention. The main idea for this whole approach is to use a single Codelet to integrate multiple RPA scripts through the config file which was introduced in the first tutorial.

The workflow itself is like I said before rather simple. You insert some data to search for in the web shop, after you complete the search form an agent will be executed which searches automatically for an item with the given text. If it found some, the first will be chosen and the price as well as the name will be returned into the net and displayed. If no item was found, this will be displayed, too, and the workflow ends. In case of a returned item, you can decide whether to “buy” this item or cancel the process. For the buying task a new Robot will be executed, which puts the item into a basket. Mind that this is only a mocked web shop, so you don’t run danger into buying anything.

2 Difference in detail

At the first expression this approach doesn’t differ much from the one in the first tutorial except that two different Robots were used, but this impression is wrong. In the background are many steps for data transfer, validation and exception handling done.

But let’s get this done from bottom up. One of the main advantages of this approach is, that you can transfer your individual XML data types to an Robot.

In this example I defined two data types through the data type definition manager in YAWL. I defined an output datatype for returning the items attributes and an input data type for inserting a name to search for. This could be stretched far more out, like giving a max or min price or a color the item must have. A defined data type can be used as an net or task variable.

Like stated in the Codelets description there are some provide and some custom inputs and outputs. If you chose the Codelet to automate a task you must configurate the input Variables “RPAScriptName” and “GeckodriverPath” as well the output Variables “ExecutionFailed” and “Exception”. RPAScriptName is the Codelets input parameter to identify, which of all available Robots you want to execute at this task. GeckodriverPath was already described in the first Tutorial and is used if you don’t want to configure the path of your driver beforehand. Exception and ExecutionFailed are used to handle occurring errors in the net itself. They can be used to execute some compensating actions, so you get a controlled feedback why there was an abortion instead of just a runtime exception. But the exception management will be discussed in detail in an later tutorial.

CodeletInput and CodeletOutput are a bit tricky variables. They aren’t necessary if your wished Robot doesn’t need them. In fact, you are supposed to act carefully that you provide these two only if they are needed, because this will be validated in the Codelet and can led to an Exception if done wrong. The Codelet is able to recognize every valid data type and transfer it to or from the net to the robot as long as you set the variables type as the datatype and give the Robot a hint of the type (see below for more information). Very important here is that you give a default value, if you need an output. This default will be used in case of an exception because if you define an Output YAWL does always except one. In the second automated task, where the robot puts the item into a basket there is no output but an input.

The RPA script must extend the supertype AbstractSeleniumScript which is provided as a jar file. This forces you to implement some methods, to specify whether the robot needs input/output and which types. Please note that the whole validation inside the Codelet can’t be done if you don’t work accurate on this. The stated input/output type must be the same as in the net. If you work properly you can use the Information given in your Script. For this there is the class “XMLTransformer” provided, which transforms the transfered XML-String into a jdom Element, which can be read in runtime, or transforms a jdom Element back to a String for returning data.

The returning inside of a Robot is a bit tricky, therefore here a cutout of the searching Robot


        Element result = new Element("result");

        result.addContent(new Element("ItemNameResult").setText(itemName));

        result.addContent(new Element("ItemPriceResult").setText(itemPrice));

        result.addContent(new Element("ItemFoundResult").setText(("" + itemFound)));

        return XMLTransformer.XMLtoString(result);

There is  also provided a class for easy Webdriver creation which is called “WebDriverFactory”. With this you can just generate a new instance which is already configured with a profile and can handle waiting times, but feel free to try your own webdriver configurations here.

You’re asking yourself now how to integrate those RPA-Scripts into YAWL? Its pretty easy, you just have to compile a Jar-File with the RPA-Script file, Abstract-Selenium-Script file and if needed the XML-Transformer file and the WebDriverFactory. As soon as you compiled this Jar file you can write down the path in the config file, which was introduced in the first tutorial. This config file inherits the path of the Geckodriver for the WebDriverFactory as well. 

3 How to get this working

I showed you roughly how this approach works. If you are more strongly interested in the source code behind, you can explore the attached files. But more interesting then why this approach works is how this approach works. So, let me list down the steps you must do to get this example working. If you already did the first tutorial you can skip some steps.

  1. Load and extract all attached files.
  2. Set your environment up like presented in the first tutorial (Especially the config-XML-File, the Geckodriver and the organizational data).
  3. Put the RPA-Jars (BuyItemRPA.jar & SearchForItemInShopRPA.jar) in a directory and put the paths into the Config-files <FilePath>-Elements.
  4. Put the SeleniumRPAForYawlFinal-Jar (in which the Codelet lies) into your Codelet directory like described in the first tutorial. Like the Codelet of the first tutorial this Codelet should lie in a directory called Codelet, too. For example: "codeletRootDirectory”\codelet\SeleniumRPAForYAWLFinal.jar – where the “codeletRootDirectory” is the path which was set in you web.xml-file.
  5. Check if the tasks “SearchItem” and “BuyItem” are automated (green arrow in task symbol)
  6. Start a new case and execute it

If you set up everything right the workflow should run properly now.


 4 What did we get?

With this approach we got some nice advantages. First, we need only one Codelet and can now integrate and replace multiple Robotic Process Automation Agents in runtime without stopping the YAWL Engine which is a huge benefit. Further we have a way to transfer individual data types into and out of the Robots while we can validate the data. Last, we have a Way to manage Exceptions properly, which will be discussed in the next Tutorial.


How to use Robotic Process Automation within YAWL #4 - Exception Management

How to use Robotic Process Automation within YAWL #4 - Exception Management sremp Sat, 04/11/2020 - 18:20


Exception Management

The Codelet which was presented in the last Tutorial is designed to be able to manage occurring exceptions and execute validation strategies. The main goal is that the workflow doesn’t need to be aborted just because of a failed execution. The workflow designer as well as the user should have the power to configure exeption following activities. There are three main categories in which exception can occur:

1.   

The user or the designer refer to a not available RPA script

2.   

The user or the designer transfer wrong or invalid datatypes

3.   

The RPA script itself throws an exception while runtime

These 3 exceptions occur at different stages of the execution and because of this each one needs an own validation strategy and exception management

1. Exception Handling in YAWL

Real business cases and abstract models often includes some differences from each other. Because of this there is a possibility of raising exceptions in each scenario. YAWL offers the workflow designer the ability to face these exceptions with so-called exlets. With an exlet you can define rules how to identify an exception and what steps must be done to mange the following workflow. An exlet consists of three main parts – first you have do define what type of exlet you want to configure, second you must configure the kind of exception validation and last you must define the compensation activities. For the first step, there are different types, but the most important one in this approach is the so-called post item constraint violation type. With this you can define constraints which will be validated after the execution of before specified tasks. The activities are used to either lead the workflow to a controlled end or to execute some compensation tasks.

Following I will shortly describe in what cases exceptions are expected

1.1 Chose a nonexistent RPA script


The Codelet itself loads all given paths from the configuration file. Each of these files will be scanned for all classes in them. For every class there is a check wheter this class ist he searched one. If there is no positive validation after scanning all given files there will be an exception thrown. This exception will be catched later.


1.2 Wrong or missing data

Another exception can occur if the stated and given datatype aren’t the same. Before the execution of a RPA script there will be a validation of the data transferred by the YAWL net. This validation relies upon the stated dataypes in the RPA script. A RPA script designer hast to specify wheter there is a need for an input and output and if there is, what datatypes they need. If a validation fails, an later catched exception will be thrown.

1.3 How to handle exceptions at output tasks

It’s a bit tricky to create a correct default output file if there is no information about the datatype because of the generic approach. Because of this it is very important to insert a valid default value for output data types. Fortunately YAWL offers a quick solution for generating such default data.


With this default data it can be guaranteed that even in the case of an exception there will be a controlled response of the Codelet.

2. Exception handling in this example

One of the main benefits of the exception handling offered by YAWL is the decreasing in complexity. You don’t need to configure multiple paths in your workflow for every possible exception. You just must configure how to identify and manage occurring exceptions.


The exception handling in this example is rather easy.